You cannot undo deletion of an attendee record. Rather than deleting, you may want to consider anonymizing a contact or canceling items on their record.
Remember, you can also use the “Replace Attendee” function (in Attendee Tools), for example if the original guest can’t attend but someone else is coming in their place.
Once an attendee record has been deleted, restoring it may not be possible and is a complex task that incurs data recovery costs. Please contact Support for more information.
Sometimes, you need to delete an attendee record. However, safeguards prevent you from doing this if there are linked records or outstanding payments or refunds.
You need to cancel any outstanding financial transactions (payments or refunds) before you can delete an attendee record. Check with your accounts department as it may be better to cancel all items but retain the attendee record.
You also can’t delete a contact if they’re linked to a group or another record (for example as a ‘guest of’ another contact). You first need to cancel or unlink the group/linked records.
To unlink from a group
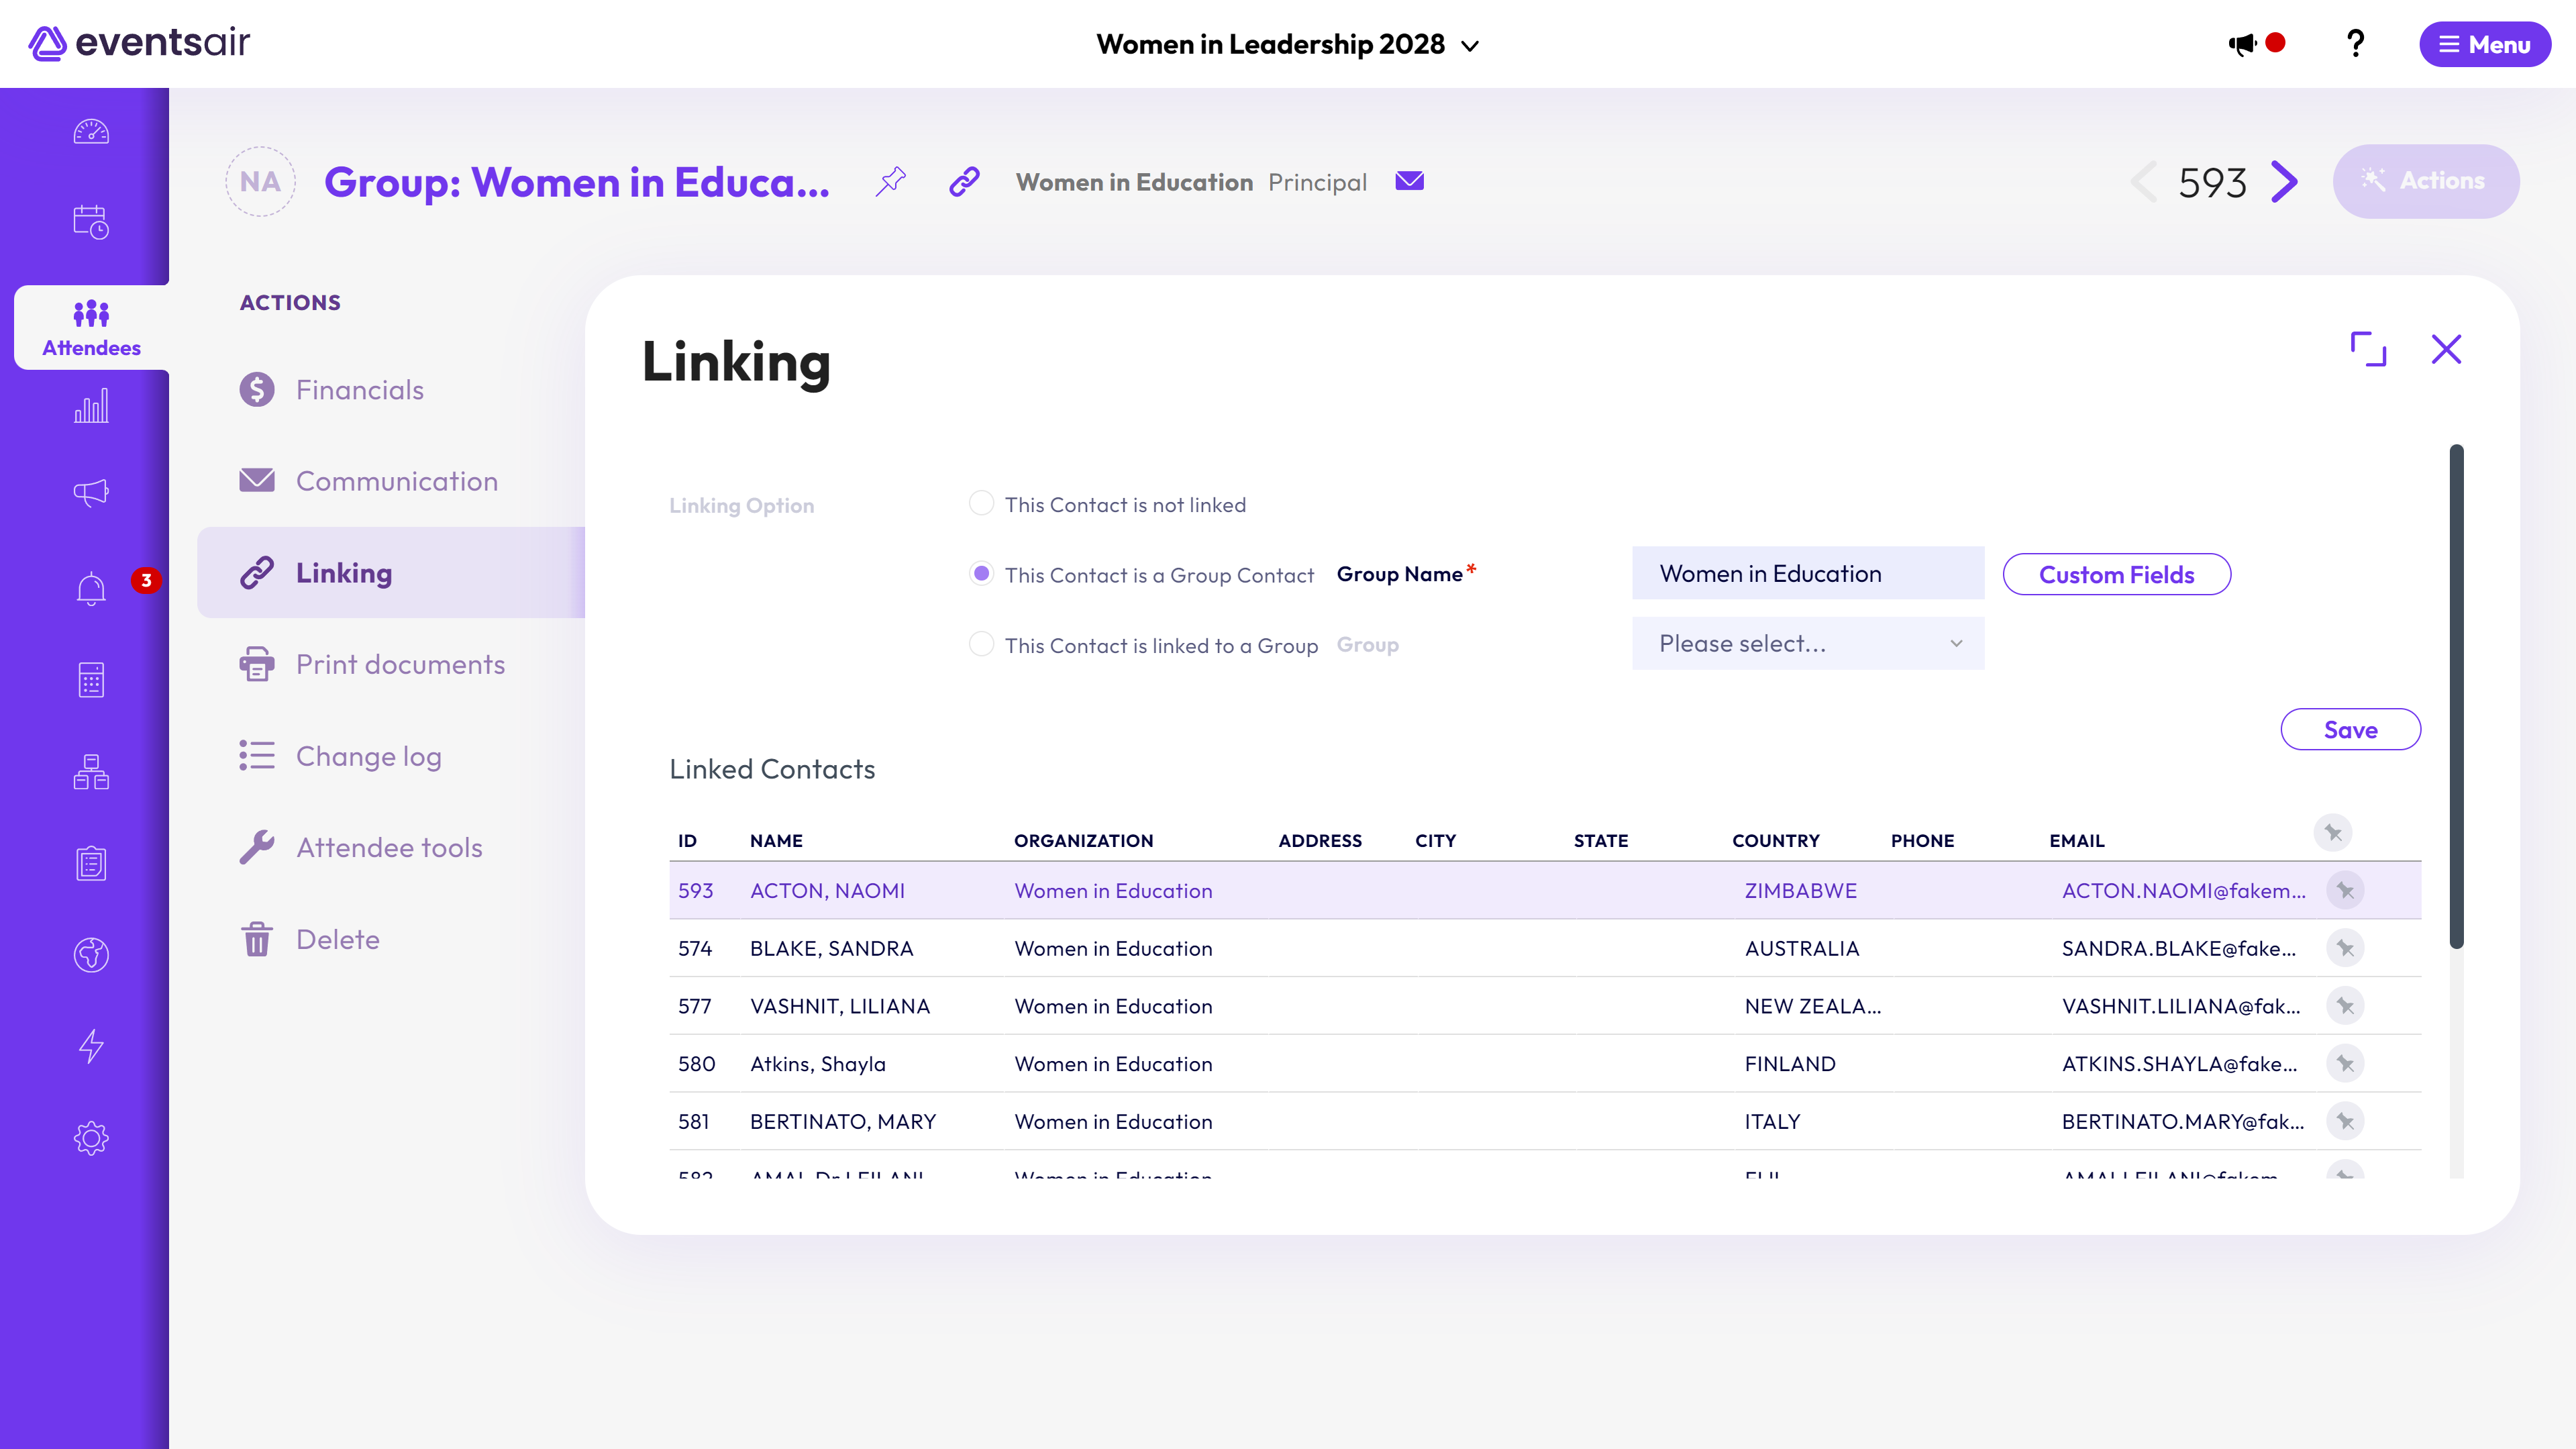
Go into the Attendee record and select the Link icon (in Actions on the right).

(This button is for group linking or unlinking).
The Linking panel shows you if an attendee is a Group Contact (leader) or is linked to a Group (is a group member).

Before deleting an attendee, you need to unlink them (select This Contact is not linked, then Save).
A Group Leader (Group Contact) can’t be deleted unless another person has replaced them as Group Contact (or there are no longer any group members).
To cancel items on an attendee record
Where there are no outstanding financial transactions and no group or other guest links, you can cancel items (such as registration or accommodation) using the Attendee Tools icon (spanner / wrench).

(Found in Attendee Actions - right-hand side).
On the Tools screen, select “Cancel Attendee”, and then at the next screen, “Cancel all module items for this attendee”.

If the person is sharing a room or the cost of a room has been split, you'd need to unlink these items also.
To delete a ‘guest of’ contact record
If the contact is somebody's guest, and has a function fee payment status of “Guest of…” [another contact], the deletion won’t be successful.
Go to the main booking contact (the name that appears after “Guest of…”).
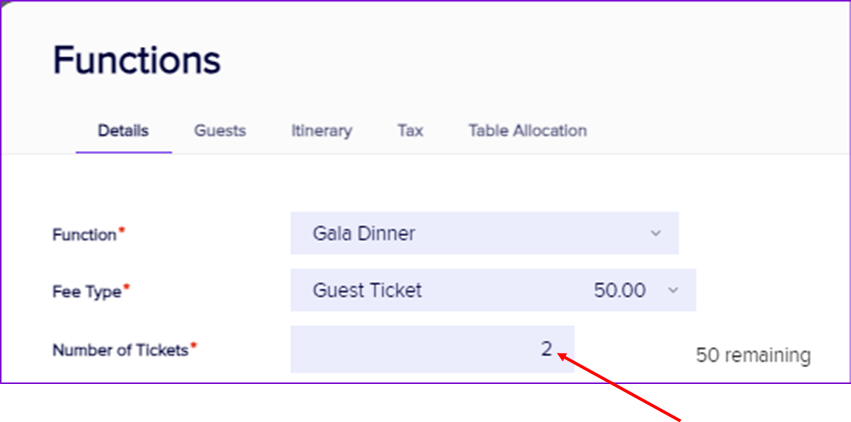
Then, select the Functions item where the Guest tickets are recorded (ideally, you’ve set this up as a Function Fee Type called Guest Ticket or similar).

In this item, reduce the number of guest tickets purchased (for example, from 4 to 2, if you only need 2 guest tickets now and want to delete two guest records).

When you reduce the number of guest tickets, EventsAir will assume you want to keep the first guest(s) on your list and cancel the rest.
But if you want to cancel (let's say) Guests 1 and 3 only, use the "Guests" tab to edit guest names as needed.


You can search for existing contacts, and/or add new contacts to fill the required guest slots. (The first name under the Guests tab is the booking contact.)
This process will cancel and re-book the items to correctly reflect the new guest ticket list. You should then be able to delete the contact record for the guest(s) who is (are) no longer attending.
Removing guest tickets from the main booking contact and all their guests
Go to the main booking contact record.
Go into the Function item with the guest tickets and change the number of guest tickets to zero.

Under the Guests tab, on the top row Untick “Booking Contact Only”.
Click Save.
You should then be able to delete the main record and guests (providing there are no other links or outstanding financial items).
To delete an attendee record:
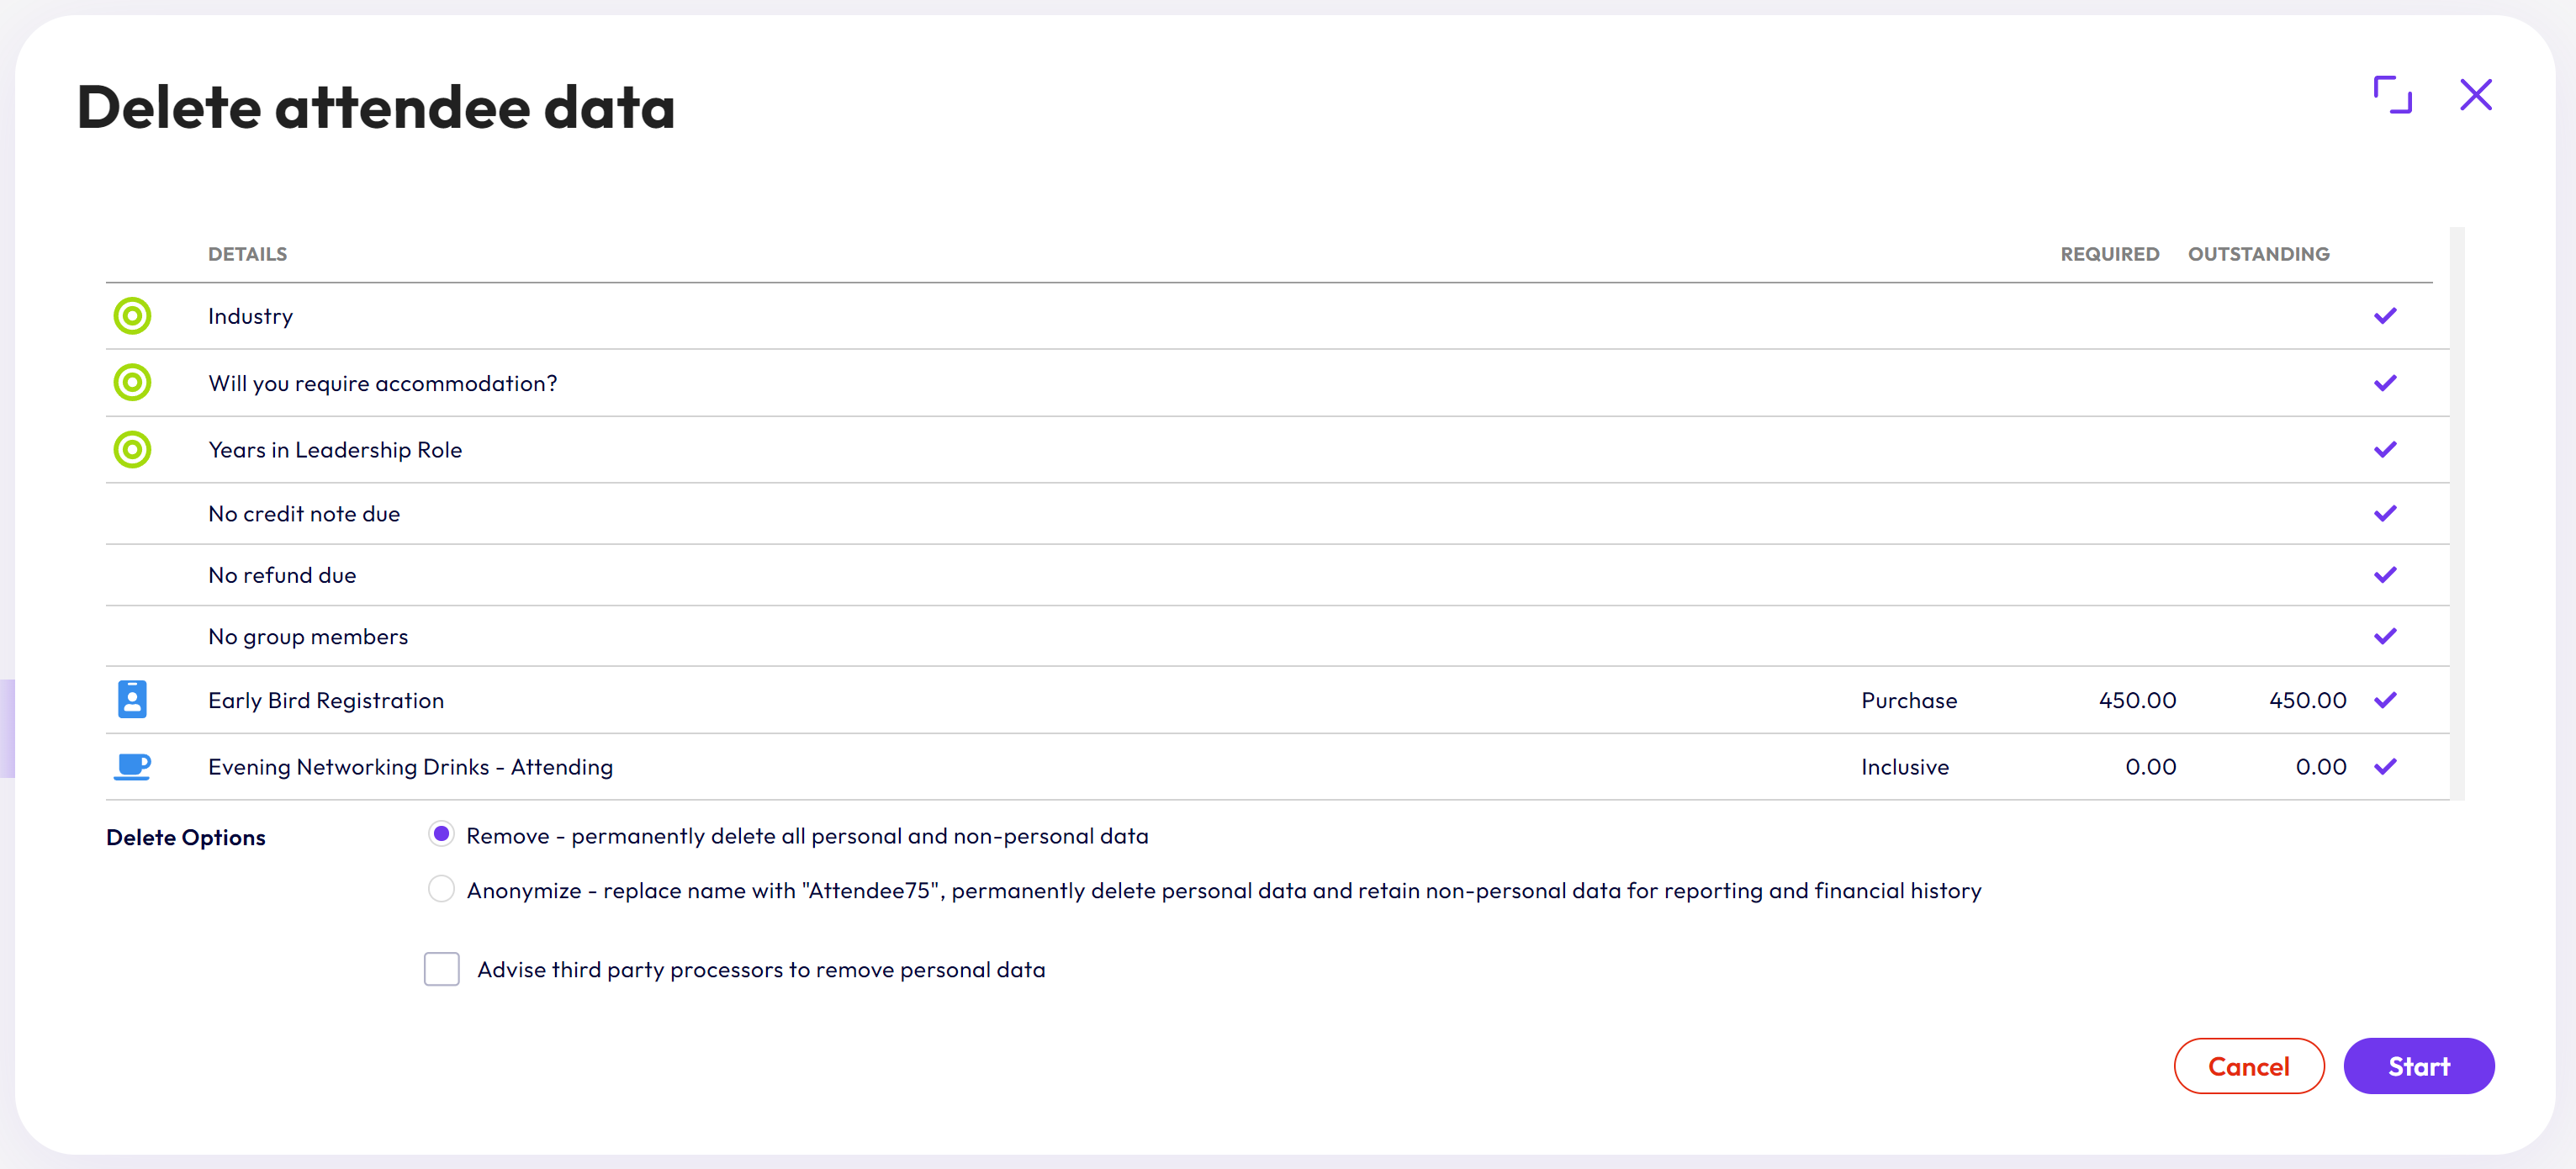
Click the Trashcan Icon (for "Delete") under Actions

If appropriate to your business processes, select:
“Remove – permanently delete all personal and non-personal data”.
Then select START.

When prompted, type the word “DELETE”, and select the DELETE button.


These extra steps are there to ensure you’re completely certain that you want to remove ALL information associated with this attendee record (including data processing logs and financial information). If you’re unsure, don’t proceed with the deletion.
