Introduction
OnAIR is often used with either Zoom Webinars or GoToWebinar to present a live webinar format presentation directly in the OnAIR Portal*. For this, you need to purchase a Zoom Webinar or GoToWebinar license with the required number of participants for your OnAIR virtual program. You also need to purchase licenses to support the number of concurrent sessions you plan to offer in your virtual event.
However, you could program your session in a simple Zoom Meetings environment, and live stream that presentation directly to OnAIR via a YouTube or Vimeo Live Stream Connection.
In additional to saving the cost of webinar licenses, you will typically see an improvement in the quality of your session live stream.
How does this Live Stream option work?
Assuming your required external connections and integrations are set up:
- Create a live stream connection in Vimeo or YouTube
- Schedule a Zoom Meetings session and choose Live Stream as your output
- Connect your Zoom Meetings session to your YouTube or Vimeo Live Stream connection
- Connect your OnAIR session to your Zoom or Vimeo Live Stream

Advantages to Live Streaming through YouTube or Vimeo
- You can use a basic Zoom Meetings License at a significant cost savings over using a Zoom Webinar license
- You can easily add and remove presenters to your Zoom Session
- You can use the Waiting Room function to manage who enters or leaves the session
- You have the full range of Zoom functionality, including the ability to mute audio, share screens, spotlight presenters, upgrading panelists to presenters and more
Before you set up a Zoom Live Stream Session
You will need to create your YouTube or Vimeo Live Stream connection prior to setting up a Zoom Live Stream.
Please refer to External Connections Needed by the OnAIR Platform for details on setting up your appropriate Live Stream Connection.
Setting up a Zoom Live Stream Session
Follow these steps to set up your Zoom Live Stream Session:
- Create and schedule your Zoom Meeting.
- Open Manager for the meeting you just created. Scroll to the bottom and click Live Streaming.
- Click Configure Live Stream Settings.
- Select Live on Custom Live Streaming Service. The following options menu appears:

Locating Your Streaming Details in Vimeo
- Navigate to your Vimeo account.
- Locate RTMP Settings.
- Copy and paste the RTMP URL into the Streaming URL field for Zoom.
- Copy and paste Stream key in the Streaming Key URL field for Zoom.

- Locate the Live Streaming Page URL under the Share Button in Destinations.
- Click on Copy Event Link.

- Paste the Live Streaming Page URL in the Live Streaming Page URL field for Zoom.
- Once all your Live Stream details are pasted into the Zoom Custom Streaming Service settings, select the Go Live button.
- Your Zoom session is now streaming live.
Locating Your Streaming Service Details in YouTube
To use YouTube, you will need to create a new stream. Please follow these steps to obtain the information you need:
- Navigate to YouTube Studio (click on your logo/photo as if you were about to sign out, and you will find YouTube Studio in the dropdown).

- Click on Create then Go Live. This will launch the YouTube Studio Live Streaming Console.

- Click on Stream to create a New Stream.
Note: This is where you will provide the stream’s Name, Description and Category as well as its availability and timing. We recommend making the stream Unlisted as this will not publicly list the stream on YouTube and will require viewers to access via the OnAIR Portal only.
- You will need to declare if the stream is designed for children (this doesn't mean is it G-rated or suitable for children - it means is it specifically targeted to children, because YouTube has different rules for advertising for these videos. Read the information at "What's content made for kids" if needed).
- Finally, there is an option to restrict your viewers to exclude those under the age of 18. You will need to leave this option disabled for the stream to be viewable in the OnAIR Portal.

- When you are ready select Create Stream to continue and this will launch the created stream’s Dashboard.
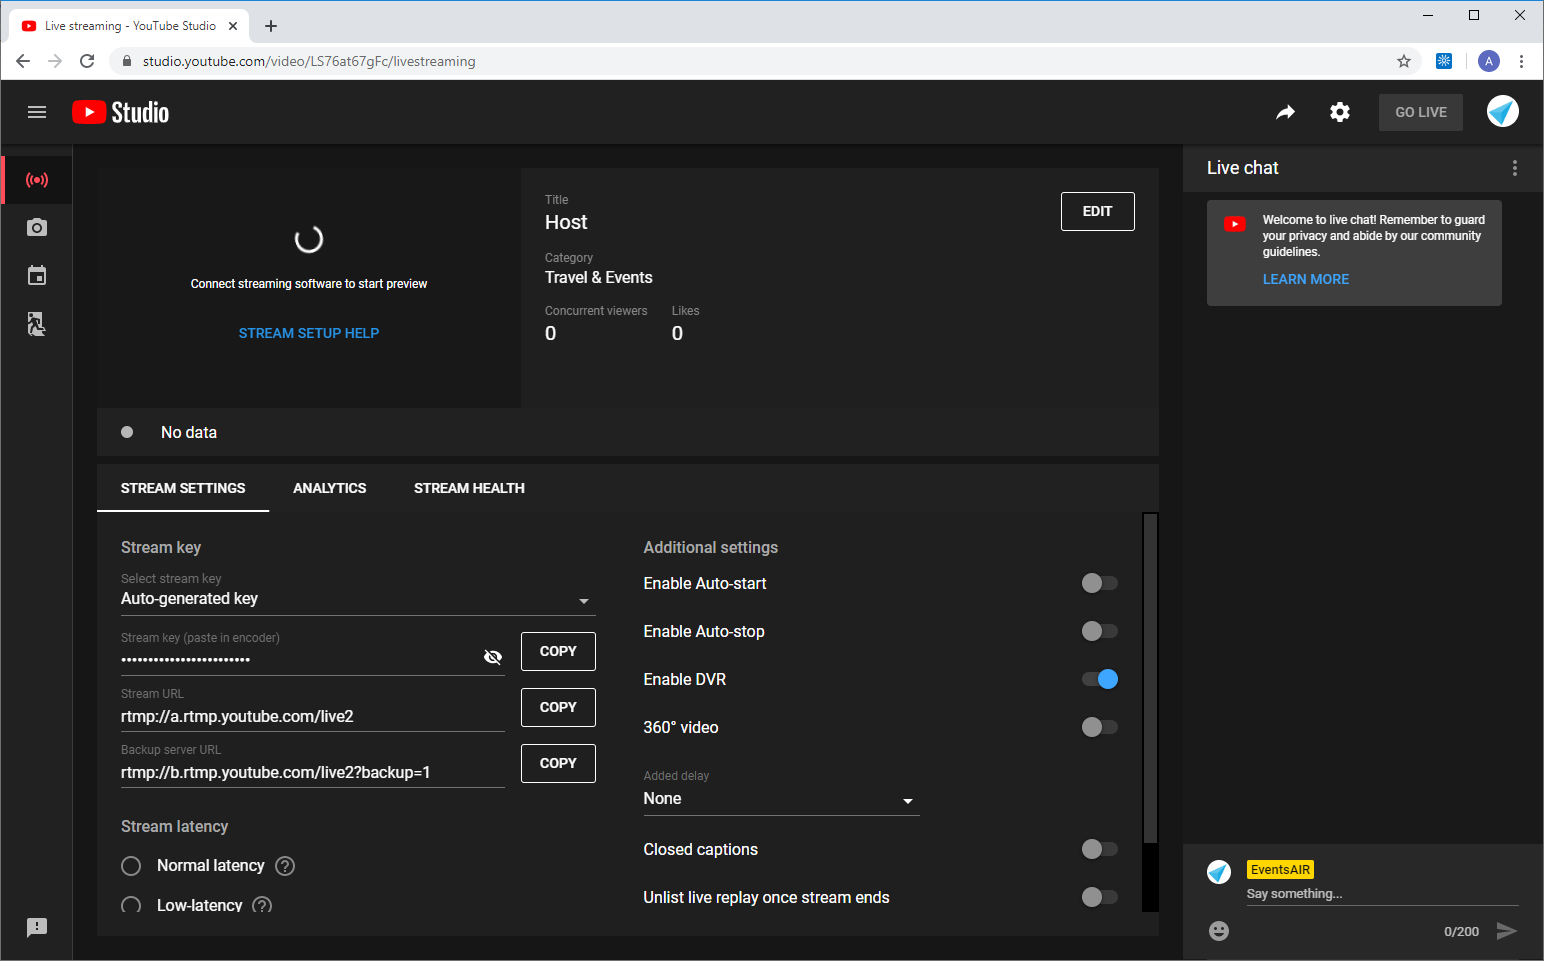
- Once your Live Steam is created, you are taken to your YouTube Studio Streaming Dashboard.
- Your stream settings are shown on the left, and you can copy the required Stream Key, Stream URL and Server URL as required.

Setting up Your OnAIR Session to connect to your Zoom Live Stream
When you are setting up your session, follow these steps and enter these details:
- Locate the session you want to Live Stream.
- Open the OnAIR tab.
- Set your Delivery Mode to Live Broadcast.
- Enter the video ID from YouTube or Vimeo. This will be the numeric or alphanumeric part of the live stream URL, so as:
https://studio.youtube.com/video/AB11ab111aBc/livestreaming
or
https://vimeo.com/manage/events/1234567/settings
- In Live Streaming Platform, select the correct Vimeo or YouTube account.
- Save your settings.
Running Your Live Stream Session
Start your session from either the OnAIR portal or directly in Zoom, just like any other session.
Click ‘More’ then click ‘Live on Custom Streaming Service”.

This will open a new tab in your default browser and establish a connection to Vimeo or YouTube.
Your session looks and feels exactly like a typical webinar format Zoom presentation, except that it is coming from a Zoom Meeting rather than a Zoom Webinar session.