Virtual Networking Function
Virtual Networking Functions lets your attendees chat and exchange contact details via live video: it's the virtual equivalent of a live networking event.
When an attendee first joins a Virtual Networking Function, OnAIR places them in a group with other attendees to engage in a video chat for a specified amount of time.
When the time expires, each attendee is placed into another conversation group. The length of each networking session and the size is set by you, but the number of people per group also depends on which streaming service you're using (just Twilio or Twilio in combination with AIRCast).
Setting up a Virtual Networking Function
- Create the function in Function Setup.
- You can set up more than one networking function at the same time using the track setting.
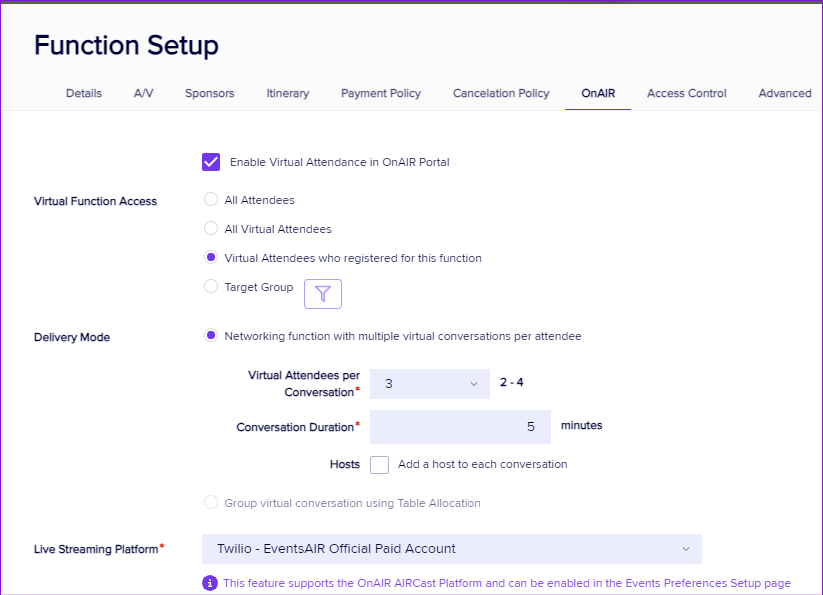
- Open the OnAIR Tab.
- Enable Virtual Attendance in the OnAIR Portal.
- Select the Virtual Function Access you want to assign for this session.
- Choose Networking Function with Multiple Virtual Conversations per Attendee for Delivery Mode.
- Select the number of Virtual Attendees Per Conversation.
- Enter the Conversation Duration (minutes), taking into account the overall length of your networking function.
- You can assign a Host to this networking function by checking the Hosts box.
- Filter for your hosts. For example, you could filter on staff registrations, or for a subgroup of attendees based on a marketing tag or other item in their contact records.
- Review, and if needed, edit the default information text for Networking Function Hosts.
- Choose the Live Streaming Platform you want to assign to this Interactive Session (this should always be your Twilio account if you see this field; in an event where AIRCast is enabled, you won't see this field)
- Select Save to save your settings.
- Create and Save a default fee type for this function.