The multi-currency feature in EventsAir lets you assign values in other currencies for registrations, function tickets, etc. These different currency amounts can then be added to different interactive (registration) sites - one for each currency - by cloning your original site and making a few changes.
Before you set up multi-currency
First, ensure your bank or financial institution allows your account with them (merchant account) to accept different currencies. You may need merchant sub-accounts for each currency, or possibly different merchant accounts for different currencies or regions. You may choose to have multiple e-commerce accounts (payment gateways) for each currency you're working with. Alternatively, you may have a payment gateway that accepts multiple currencies. Ensure you have all of this set up beforehand.
Once you've enabled multi-currency in your event (see instructions below), you can configure your payment gateway(s) and registration sites to suit your attendees' needs.
For more information on setting up gateways in EventsAir read our External Connections - Gateways.
After you've completed the steps below, you can also review your Merge Docs to ensure the correct registration site links are included.
To include amounts in other currencies in Merge Doc emails, for any element involving a fee or cost (Registrations, Functions etc.), look under the Fields Tab for that element, and select the Foreign Currency Amounts checkbox.
Step 1: Add currencies (to all events)
Create a list of supported currencies for EventsAir (for all events). From the event selection page, choose Application Setup, then Currency.


Select Currency Library and Add Currency (image shows many currencies already added).
You can do this for as many different currencies as you like.

Step 2: Define exchange rates for an event
Inside your event, go to the Setup Panel and select Event (top right).

Under Event, select Preferences, tick the Enable Multi-currency box, and Save.

Next, select Exchange Rates from the left-hand menu and set what you want to nominate as each currency’s exchange rate.
These rates do NOT update automatically when the market exchange rate changes.
You can come back to update these at any time before or during your event and the changes will be reflected on your event items.

Step 3: Add Multi-Currency for each Fee Type
For each item within your event, you can choose which currencies are accepted and, if you wish, override the calculated exchange rate (to allow for exchange rate movement).
To do this:
- Navigate to the Setup Panel.
- Select the module with the fee type you want to edit (e.g., Functions, Registrations, etc.)
- Select the appropriate item (such as RegistrationType: Early Registration).
- Review the list of available exchange rates and enable the ones you want to make available.
- You can also override the calculated fee (to build a little extra margin to account for changes in the actual rate). For example, in the example below, you could change US$80 to US$95, simply by entering that amount instead in the USD box.

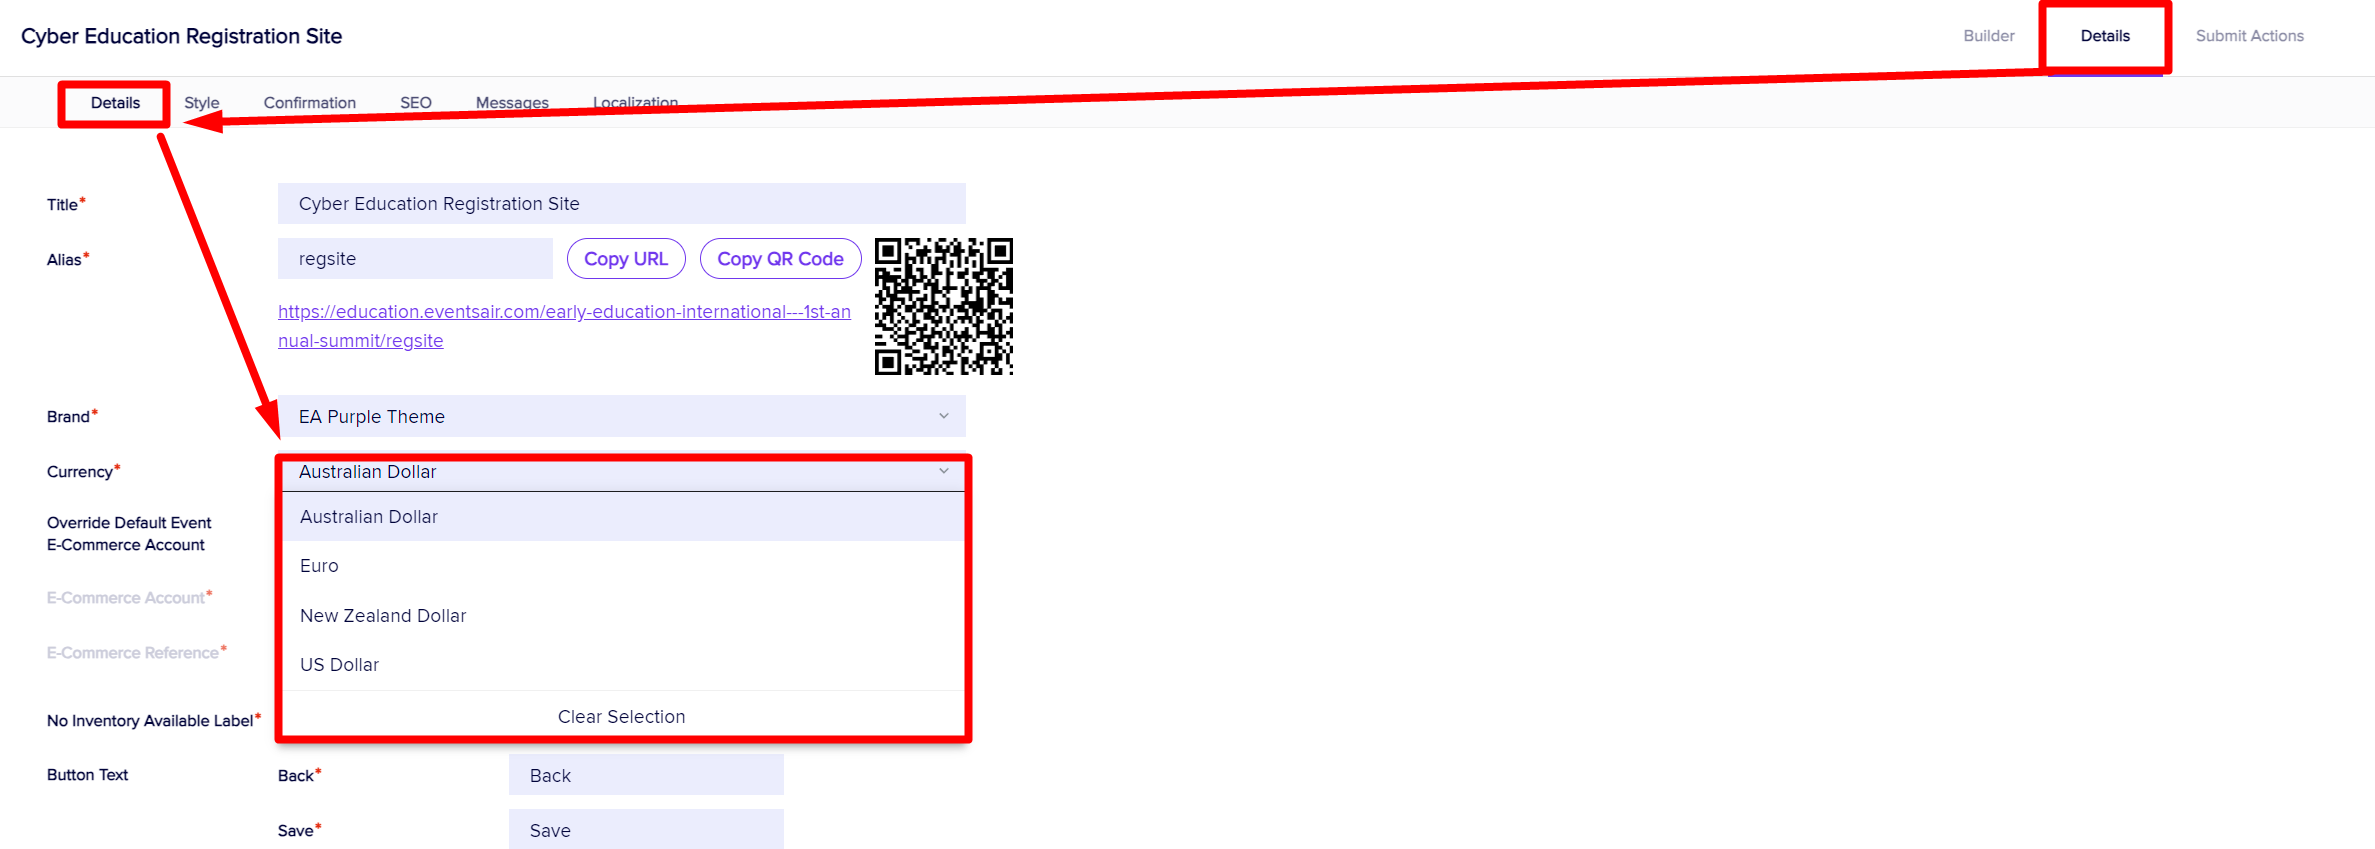
Step 4: Build your interactive (registration) sites
To offer online registration showing different currencies, you need to build an interactive (registration) site for each currency.
This is pretty easy to do since you can clone sites and modify the currency in just a few keystrokes.
- Create, clone or open the Interactive Site you want to work with.
- Select the Details Tab.
- Select the desired currency for this Interactive Site.
- If you want to use a different E-Commerce Account (Gateway), select the check to override the default.
- Select the new E-Commerce Account (Gateway) you want to use.
- Enter an E-Commerce Reference, which describes this in a few words (this is very useful when auditing your credit card transactions and helps identify which event the charge is associated with).


