Get started with EventsAir Pay - your integrated payment gateway!
|

If you're going to charge a fee for any aspect of your event, you need to plan the process of collecting and managing your payments. Your payment acceptance process may be simple or complex, depending on your event, and your organization.
Before collecting payments
First, review your set up. You'll need to consider the following:
- Tax Code(s) - Depending on your country or region's tax practices, you may be charging tax on some or all items. Usually, you need to set up your taxes and payment types before creating any registrations or contact records.
- Payment Types - You may decide to only accept cash or checks for one event, and only allow MasterCard or Visa payments for another. So, before you start building your event, you should set up your payment types for that event (in the Setup panel of your event, under Financial). Be sure to enable for online registration if the payment type should be available on your registration site.
- A Payment Gateway - in order to accept online credit card payments, you'll need:
- A Merchant Services Account - The dedicated official merchant credit card account provided by your bank or other financial services company. This Merchant account must be in the name you want to appear on your attendee's credit card statement. You may also be able to manually enter credit card numbers and receive approvals by phone, credit card swipe terminal, and via the Merchant account online website.
- e-Commerce Gateway - You need at least one e-Commerce (Payment) Gateway so you can accept credit card numbers on your website and communicate the card information to your merchant account for approval, in a very secure and protected way. You're responsible for organizing and covering the cost of your external Payment Gateway.
- EventsAir Pay is your integrated e-commerce option. Talk to your account manager to find out more.
Settings for your e-commerce (payment) gateways
Before creating payment settings within your event, check your Application Setup area (which covers settings across all your events).
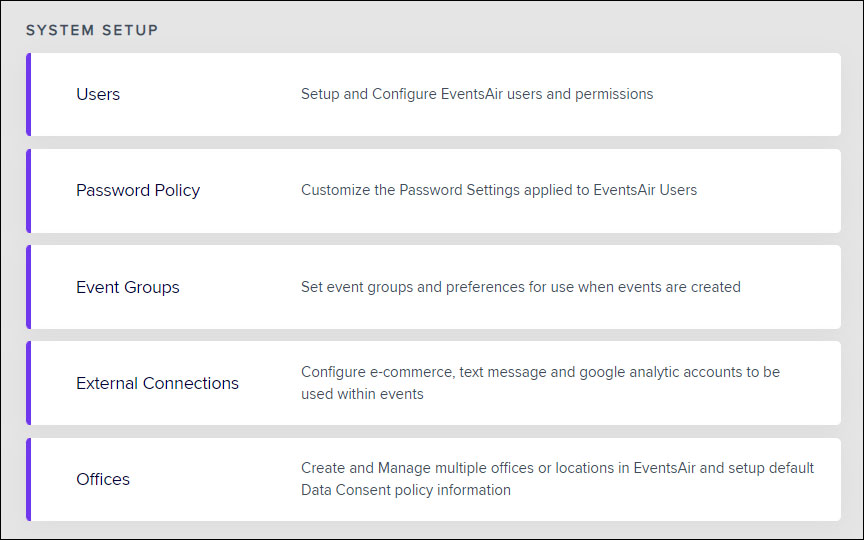
If you haven't already got an e-commerce gateway set up, from the start screen, choose Application Setup (you'll only see this if you're an Admin for your EventsAir account).
- Under SYSTEM SETUP, open External Connections.
- To connect your EventsAir Pay account, select the "plus" icon next to EventsAir Pay, if you see this option.
- Follow the Customer Success team's instructions for setting up your EventsAir Pay account.

To connect a different e-commerce gateway:
- Select the E-Commerce Gateway Setup option (the plus icon).
- Enter a name and select your Payment Gateway.
- Enter the details your Gateway Provider has supplied (such as Merchant ID and access code).
Enabling an e-commerce gateway for a specific event
- From the Setup panel, under SYSTEM SETUP, select Event.
- Select Preferences.
- In the External Connections tab, for E-Commerce Account, select the correct Payment Gateway. (You'll see your EventsAir Pay account as the first option if you have this set up.)
- OR set up any other e-commerce gateways you want to add for this event.
- Add in your own internal E-Commerce Reference (this will be what appears in your e-commerce gateway statements as the reference for transactions relating to this event).
- You may want to choose "test mode" (but don't forget to switch it off before you go live, and clear out any test transactions).

Create overall tax settings
NOTE: Even after setting up a default tax here, you should also check when creating any fee types or payable items (in Registrations, Functions, Accommodation etc.) that the appropriate taxes have been added to that item. Look under the Advanced tab for each payable item. You can also remove or vary the tax on each item in this way.
- Go to the Setup Panel (in your event).
- Select Financial under System Setup.
- Select the + icon to the right of Taxes. You'll need to define your region's tax code(s) and percentage(s).
- Enter and save your Tax Details for your country or taxing authority.
Setting up Payment Types
While you're still in the Setup Panel, under Financial (in System Setup):
- Select the + icon to the right of Payment Types. Here's where you need to create payment types for all the various ways in which you plan to accept payments for your event: for example, cash, check, direct deposit, and various credit cards.
- For online payment methods, check the box that says "Enable for Online Registration".
- Enter and save your Payment Types, such as MasterCard, Visa, American Express, Cash, and Check. Be sure to select the correct Funding Type for each type of payment accepted.
- You have the option of adding credit card fees and cancellation fees when you set up the Credit Card payment type.
- You should consider checking the box next to Confirm Amount During Payment Entry. This is a good safeguarding process to confirm amounts before processing.
- Use the default Credit Card Fee accounts and Bank Accounts for now. When you set up your chart of accounts for budgeting and expenses, you can update these settings very quickly.
Add the Payment Page to your Interactive Site
Click and drag a Payment Page section onto your site. You can enable and disable credit cards or pay later options. (Read more in the article about setting up interactive registration sites.)
Testing your online payment and refund system
When enabling your e-commerce gateway, you also have the option to enable E-Commerce Test Mode. We recommend you set a reminder to double-check it's been switched off before your event.
Enter several test transactions and confirm with your credit card gateway service that the charges are correctly being transmitted.
Turn off Test Mode and enter several small test transactions (creating a function type for $1.00 is a good way to do this). Process the transaction, and follow it to your credit card gateway service, and then to your merchant account.
Then test refund process. You should refund the test charge in EventsAir and process it to confirm it's being transmitted both to the credit card gateway service and to your merchant account.
To process a payment manually
First, locate the correct attendee record, and check the appropriate module(s) to ensure that payment is due.
- Select the Financials Action [dollar sign icon] from "Actions" on the right.
- By default, the Financials window will only show outstanding fees. You can select the Show All button to see all transactions, inclusive, no charge, or payment required.
- Select each item you want to apply a payment for. Double check that the amount of your credit card or payment equals the amount displayed as Outstanding.
- If you're using Payment Batches, you can use the current batch or select New to set a new Payment Batch number. [Read more about Payment Batches below.]
- Select your Payment Type (for online payments, you're entering in details and an authorization code that you actually process in your payment gateway, or directly with your Merchant Account).
- Select Save Payment and close the window.
You can look at the appropriate Module in the Attendee Record to confirm that payment has been applied.

Attention to detail when manually processing payments
Payment Batches
Payment batches are a way for organizers to categorize their financial transactions for a specific time period. For example, you may want to run banking deposit reports every day, or once a week.
By assigning a payment batch number for a specific series of payments and refunds, you can easily filter against a specific payment batch. This makes your banking and financial reporting much easier to handle, audit, and report against.
The Open/Close Payment Batches utility in Express Actions will let you open and close batches as required.
Enabling Payment Batches
To track Payment Batches, you will need to select Track Payment Batches in the (Setup Panel) Financial Setup section, under Preferences:

Entering and tracking Payment Batches
Tracking payment batches occurs when you receive payments. In the Financials Action (in an Attendee record), you can enter an existing batch number, or select New to create a new batch number.
You will want to create your own internal workflow around Payment Batches. Your workflow will take into account the frequency of adding new Batch Numbers and how each batch correlates to your financial deposit activity and reporting.

You can view the current Payment Batch activity by viewing the Payment Batch Widget on the Dashboard, as shown here:

When you're running Financial Reports, you can filter on Payment Batch numbers.
Opening and closing Payment Batches
You can open, close, and re-open Payment Batches in the Open/Close Payment Batches Express Action. To open or close a payment batch, run the Express Action and choose the Payment Batch you want to manage.
Then select the correct action for a specific batch. You can always re-open and re-close Payment Batches if needed (in cases where a payment was associated with an incorrect Batch Number).
You'll also need to ensure you have the right permissions in Application Setup - Users to re-open payment batches.