
The EventStream Manager, in the Communications Panel, is where you configure and manage:
- Live Feed - a scrolling list of all posts, comments, images, videos and more. You can edit or delete a selected post.
- Leader Boards - a list of all Leader Boards which you can enable and edit as required.
- Moderate - if you've enabled Moderate Posts in Settings, you'll see a list of all submitted posts waiting for approval. You can view, edit, approve, or delete a selected post.
- Advertising - you can insert advertising including images and URLs into the EventStream feed, defining start and end dates, and display frequency. You can also place ads on hold.
- Engage - the EventStream Engage gamification platform lets you create goals and badges, award points, create prize draws, and much more, all focusing on encouraging your attendees to engage and connect with exhibitors, sponsors, other attendees and your overall event. Read more here.
- Settings - this is where you can configure all EventStream settings, including:
- Enabling and configuring Leader Boards
- Moderating EventStream and Social Media Posts
- Enabling Automated Posts for agenda items, event, session and function check-ins, Twitter feeds, as well as exhibitor lead scan check-ins
How to use each tab in EventStream Manager
Live Feed tab
Edit/Delete buttons - available for each post. (You can also see who's submitted, when, and their contact photo.)
New post button - create a post (will show your name as the creator, but you can edit this). You can add images (but not videos).
Download - download details of all posts currently appearing on the screen.
Moderate tab
This tab appears if you've enabled "Moderate EventStream Posts" in Settings.
You can review all submitted EventStream and Social Media posts waiting for approval from your management team. Options include:
- Lists of posts awaiting approval
- Show EventStream
- Show Social Media
For each item awaiting approval, you can edit, delete, or approve the post.
Leader Boards tab
This is where you can see the Leader Boards as they're displayed in the EventStream. (These will only appear if enabled in Settings.) Categories include:
- Top Ten Contributors
- Top Ten Posts
- Top Ten Mentions
- Top Ten Tags
- Top Ten Commenters
- Top Ten Engage Point Winners
Advertising tab
You can insert and manage advertising displayed in the EventStream feed (both in the Attendee App and in the EventStream Wall). Options you can configure include:
- Name
- Start Date
- End Date
- Display Frequency - controls how long each ad should display (select from a drop down list of minute or hour frequency options)
- On Hold - check this box to temporarily hold or remove the advertising from EventStream
- URL Link - enter the URL that is linked to the scrolling ad (attendees can tap the image to jump to the URL)
- Image - upload an image that you wish to display in EventStream
Engage tab
EventStream Engage is a comprehensive gamification platform to provide you with numerous games and goals to encourage interactions and engagement between your attendees, speakers, sponsors and exhibitors. Read more here.
Settings tab
This is where you can configure all EventStream settings, including:
- Leader Boards - enable and edit labels for these Leader Boards:
- Top Ten Contributors (based on number of posts)
- Top Ten Posts (based on number of likes)
- Top Ten Mentions (based on the most tagged attendees)
- Top Ten Tags (based on the most used Hash Tags)
- Top Ten Commenters (based on the attendees with the most comments)
- Top Ten Engage Points (based on the attendees pursuing goals as defined in EventStream Engage)
- Automated Posts - this is where you can automatically include the following posts in the EventStream Wall:
- Agenda item starting soon
- Event Check-In
- Exhibitor Lead Scan Check-In
- Function Check-In
- Session Check-In
- Retweet Twitter (see below)
You are also able to set the date and time ranges for Automated Posts.
- Moderate - enables post moderation. You can select one or both:
- EventStream Posts
- Social Media Posts (Twitter)
Setting up Twitter/X Re-tweets
To set up automatic re-tweeting into EventStream, you’ll need a Twitter Developer-level Account, and be on the Twitter Basic subscription plan or higher. (You'll need to have a paid account for this as the free account tier won't allow you access.)
The Basic plan has a Tweet retrieval limit of 10,000 per month.

Currently, EventsAir will retrieve up to 100 Tweets every 5 minutes during the period specified when you tick ‘Create Automated Posts From’ and set a date range You can check how many Tweets you’ve retrieved and how many remain on your Twitter Developer dashboard.
Read more info or log into your Twitter Developer account here https://developer.twitter.com/en
Obtaining the credentials (API Key and Secret)
- Log into your Twitter Developer account.
- Click on the Products menu and confirm this account has at least Twitter ‘Basic’ access, and the Tweets entry is ‘Retrieve up to 10K Tweets per month’ (or higher).
- Click on the Projects & Apps menu. If you don’t already have a Project listed, create one (which you can name anything you like).
- Click the Add App… button, then Create a new App.
- We suggest name it ‘EventsAir Connector’.
- The API key and Secret are presented in the last step. Save these as you’ll need them later and they’re not available again from the UI.
- Once the App has been created, confirm ‘V2 Access’ as shown below.

[If you’ve lost the API key and Secret, go to App you created and use the Keys & Tokens menu, then use the API Key and Secret label “Regenerated” button.
Set up the EventsAir External Connector
- In EventsAir, go to Application Setup.
- Under SYSTEM SETUP, choose External Connections.
- You’ll need to create a ‘Social Media API Account Setup’ with the type ‘Twitter (search)’.
- Use the Twitter API Key and API Secret you obtained earlier.
- Save.

Add this connection to a specific Event
- Go to the Setup Panel for the event
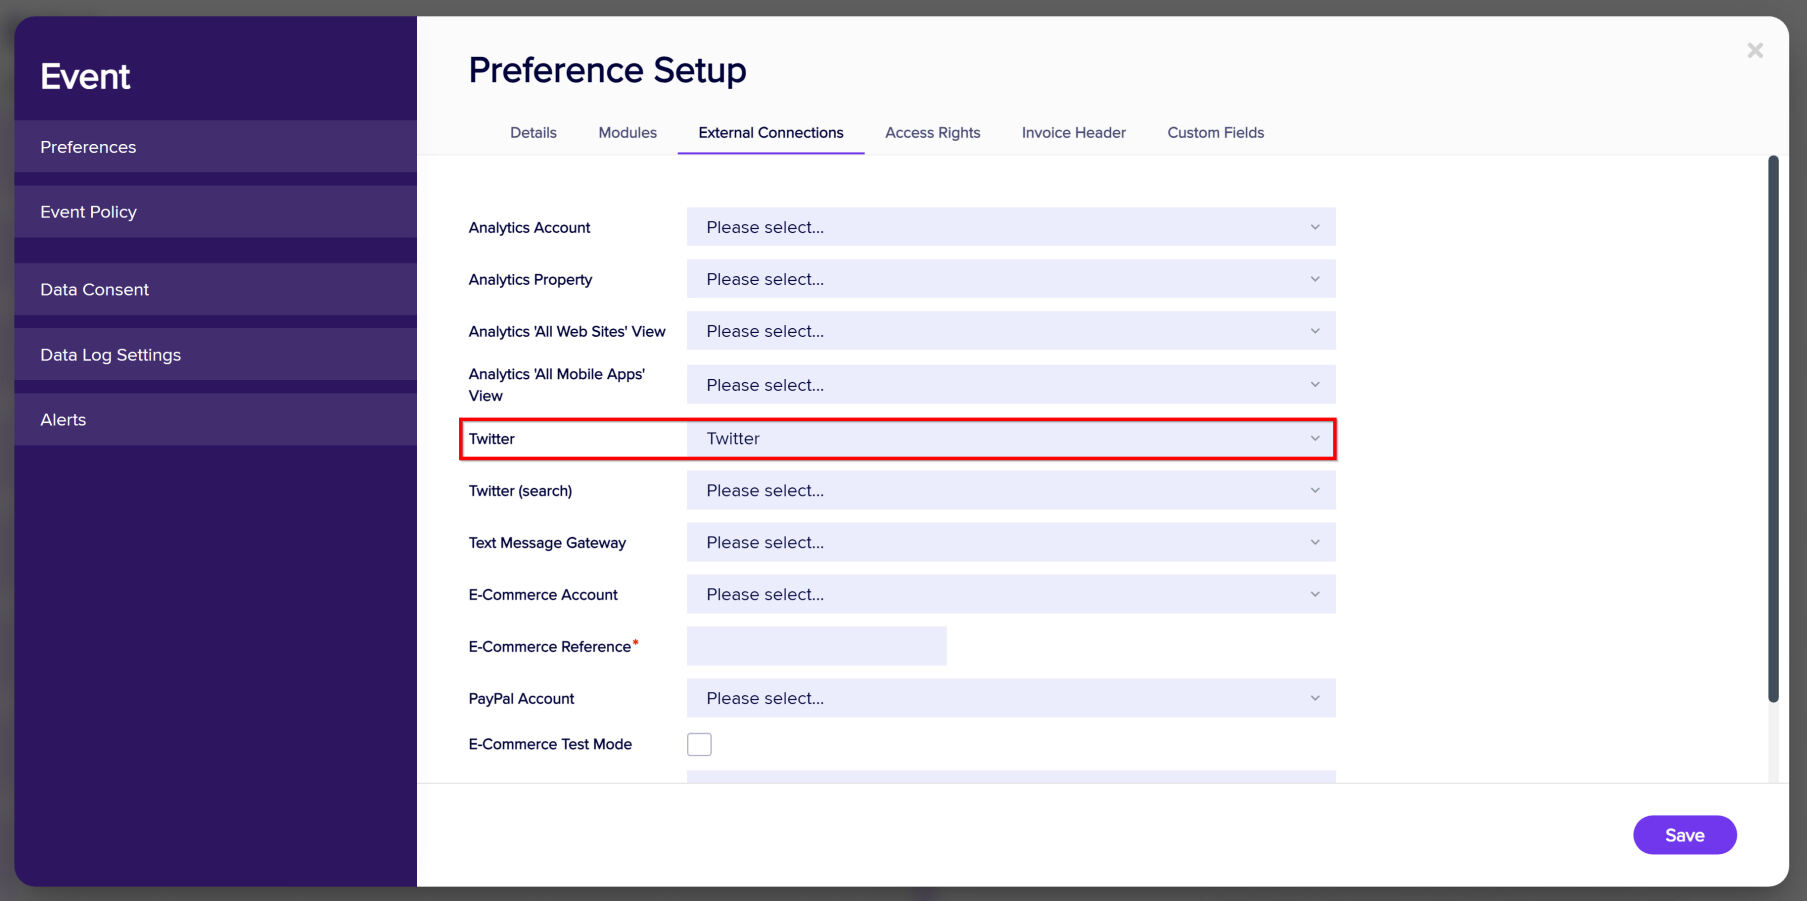
- Choose Event > Preferences, and the External Connections tab.
- Select the ‘Twitter (search)’ connection you created earlier for the Twitter (search) field (you’ll only be able to see this if you’ve already defined a Twitter (search) external connection).

Configure EventStream Manager
- Go to the Communications Panel and select EventStream Manager (last icon on the far right-hand vertical bar).
- Under the Settings tab, choose the Automated Posts sub tab.
- Check the box to enable ‘Retweet Twitter’, and enter the hashtags you want to retweet, followed by a date range to retrieve posts. [Taking into account your Twitter account monthly limits].
Automated Posts cannot be set greater than one day before or after your event dates in Event Setup.
