You can manually record a refund in EventsAir, but you'll also need to use your normal financial and banking procedures to issue the actual refund.
Credit card refunds may be made automatically if your payment gateway is set up correctly and allows refunds, and you select the checkbox for ‘Process Refund via Gateway’. EventsAir Pay lets you refund directly via gateway.
No matter what your policies are, be sure to control the refund process carefully. All financial records need to be kept accurately.
Processing a refund has several steps:
- You must first cancel the item if a payment has been made.
- You then manually enter a refund in the Financials window.
- In some cases, if it’s a credit card refund being processed via a Payment Gateway, you MAY be able to issue actual refund using the process below. Otherwise, follow your own financial processes to issue a cash or bank transfer refund, or refund via your payment gateway.
IMPORTANT: There are slightly different processes if the item is part of group inventory, or has been charged to another contact.
See more information below.
Canceling a Function or Registration item that an individual has purchased
- Select the item to cancel.
- Change the Payment Status from Purchase to Canceled.
[NB - this is what you do if the original Payment Status was "Purchase". See below for information on what to do if the original Payment Status was "Charge to Another Contact", "Group Inventory", or if the item itself is a bulk purchase for a group.]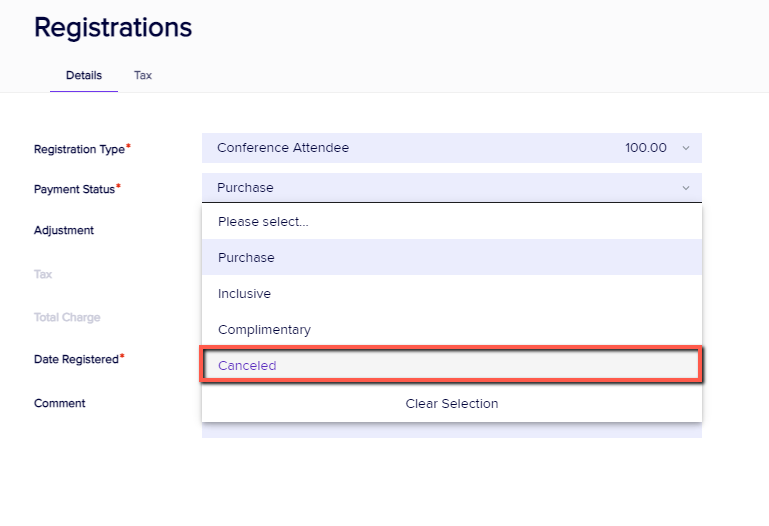
- Save your entry.
- If you look at the appropriate module, you'll now see a red line drawn through the item you just canceled.


Manually entering the refund
- Select the Financials Action Button (the dollar sign icon, under "Actions").
- Your canceled item should be displayed, with a negative balance showing under Outstanding.
[NOTE: If you'd set up a cancellation fee on the item, the refund will be less than the original payment. You also have the option to override the cancellation fee during this step. Depending on your company policies, you can also refund back any credit card/payment fees that were charged at the time of payment. Look under Actions, Financials, in the Miscellaneous Charges tab for credit card or payment fees you want to cancel.] - Select the New Refund Tab.
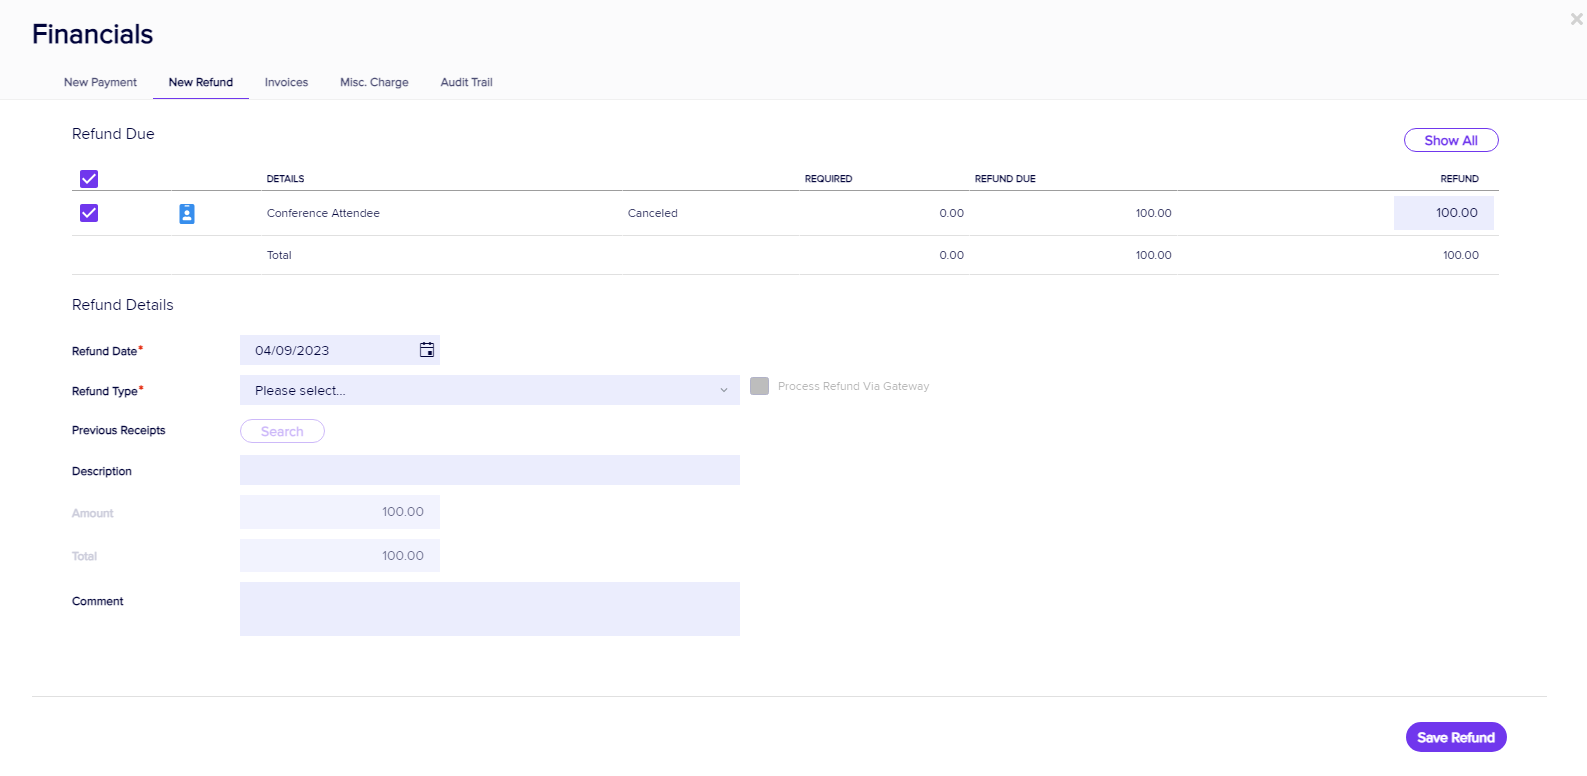
- Select the item to confirm your need to issue a refund.
- Enter your Refund Type details.
- If you are using Payment Batches, you can use the current batch or select New to set a new Payment Batch number.
Read more about Payment Batches in this article. - Select Save Refund.

Automatically processing a refund (via some credit card gateways)
If your e-commerce gateway provider allows it (check first), you'll be able to process a refund using the steps below.
Follow steps 1-4 above, then:
5. Select your Refund Type (must be the credit card where the initial purchase was made).
6. Tick the box that says Process Refund via Gateway.
7. For "Previous Receipts", use the Search button to find and select a previous payment receipt to process the refund against.
- You can select any prior receipt to process your refund against.
- You can process a refund for any amount, up to the value of the receipt.
- The same receipt can be used multiple times for refunds, as long as the total amount of refunds do not exceed the total value of the receipt.
8. Select Save Refund.
Canceling and refunding an item that came out of Group Inventory
If your event has group registrations, be careful when canceling and refunding items. In particular, you want to make sure you don't cancel all group members' items accidentally.
In some cases, the original purchase (bulk tickets or items for the whole group) was made by the group contact. Do you just want to cancel one item, or entire group inventory?
If an attendee is part of a group (perhaps for some other item) but has paid for this item individually, you can simply cancel the item for that specific attendee, using the steps outlined above.
However, if an item has been taken from group inventory, you need to follow the steps below to cancel just that one person's item:
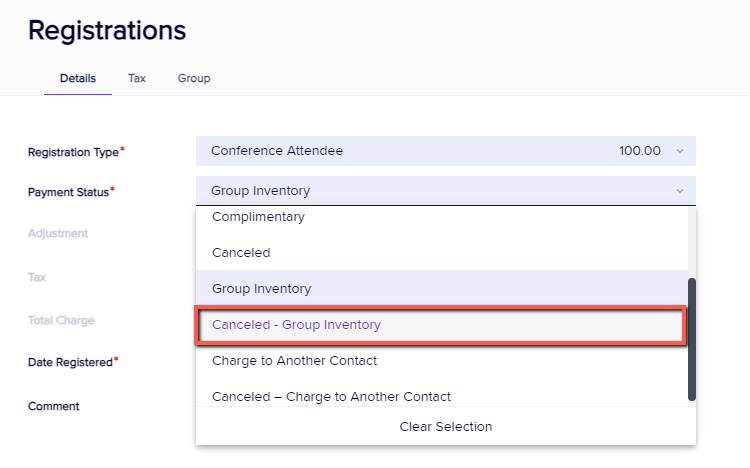
- Find the record for the group attendee who wants to cancel. The item will have been purchased with the status "Group Inventory". [NB this purchase status doesn't mean it's the group's allocated inventory - it means 'deduct this item from group inventory'.]
- Select the item and change the payment status to Canceled - Group Inventory

If your group contact (the person nominated as the 'group leader' or main contact), wants to cancel just their ticket, be careful not to cancel the group items for all group members.
[In the image below, you can see where the inventory of 10 x $75 tickets has been purchased for the group, and this item is shown in purple. It has the payment status "Purchase". Canceling this item would cancel it for any group members who've booked a ticket from this inventory.]
If you just want to cancel the item that uses the group inventory on an individual's record, look for one item (booking or ticket) with a payment status of Group Inventory. [i.e. the second item in the image below.]

Refunding an item that's been charged to another contact
Sometimes, an attendee may have 'purchased' an item by charging it to another contact. (For example, Person A has a ticket with a payment status of "Charge to another contact". Person B is the other contact - the person who's actually purchased the item.)
If Person A needs to cancel, you would cancel the item on their record, changing the payment status to "Canceled - Charge to another contact". Then you'd go to Person B's account, under Financials, to process the refund.
To cancel a guest ticket (where another attendee has paid)
If someone has purchased a guest ticket for somebody else, and your registration site recorded guest details, you may later need to cancel and refund for one or more of the guest tickets purchased. Do NOT cancel these items on the record of the guest ticket holder when their payment status is "Guest of" (paying attendee).
[Even if you changed a guest's payment status from Guest Of to Canceled, you wouldn't cancel the payment item from the paying person's record, and it's going to cause other problems.]
Find the record of the paying attendee, and go into Functions and the Guest Tickets item.
Manually reduce the number of guest tickets purchased (for example, from 4 to 2, if you only need 2 guest tickets now).
EventsAir will assume you want to keep the first guest(s) on your list and cancel the rest.
But if you want to cancel (let's say) Guests 1 and 3 only, use the "Guests" tab to edit guest names as needed. You can search for existing contacts, and/or add new contacts to fill the required guest slots. (The first name under the Guests tab is the booking contact.)

This process will cancel and re-book the items to correctly reflect the new guest ticket list.
You will now be able to process the refund(s) for any guest tickets that are no longer needed.
Issuing a Credit Note
Credit notes (to reverse an invoiced transaction) are created automatically when you cancel an item, unless you transfer the item to another attendee. After you cancel an item, if you go into Attendee Financials and look under the Invoices tab, you'll see a credit note is ready to issue ('Pending'). A credit note can be previewed and issued in the same way as an invoice, and will attach to a Merge Doc if required (if you've added Attach Invoice to the Merge Doc).