EventsAir's drag-and-drop builder lets you create interactive (registration) sites, Merge Docs (emails) and mobile apps (Attendee and Organizer apps) quickly and easily, for a professional result in a matter of minutes.
You can create or edit by dragging "components", sections and elements from the left panel to the main working area of your page.
Once you drop in components, you can move and customize the content, add headings, page breaks and more.
Important elements of the EventsAir Builder
Different sections of EventsAir will show you different components. When you first create an interactive (registration) site, app or document, you'll usually start in the Builder Tab.
Builder tab
Assemble the components of your interactive (registration) site, mobile app or communication by dragging a component to the "Drag Items Here" section, then expand or move them around as needed. Some different tools you can use:
Filter/Search:
- Components in the builder are arranged by pages - you can use the forward/backward arrows to see other available components.
- You can also quickly find a [module] component such as Registrations or Accommodation by searching here.
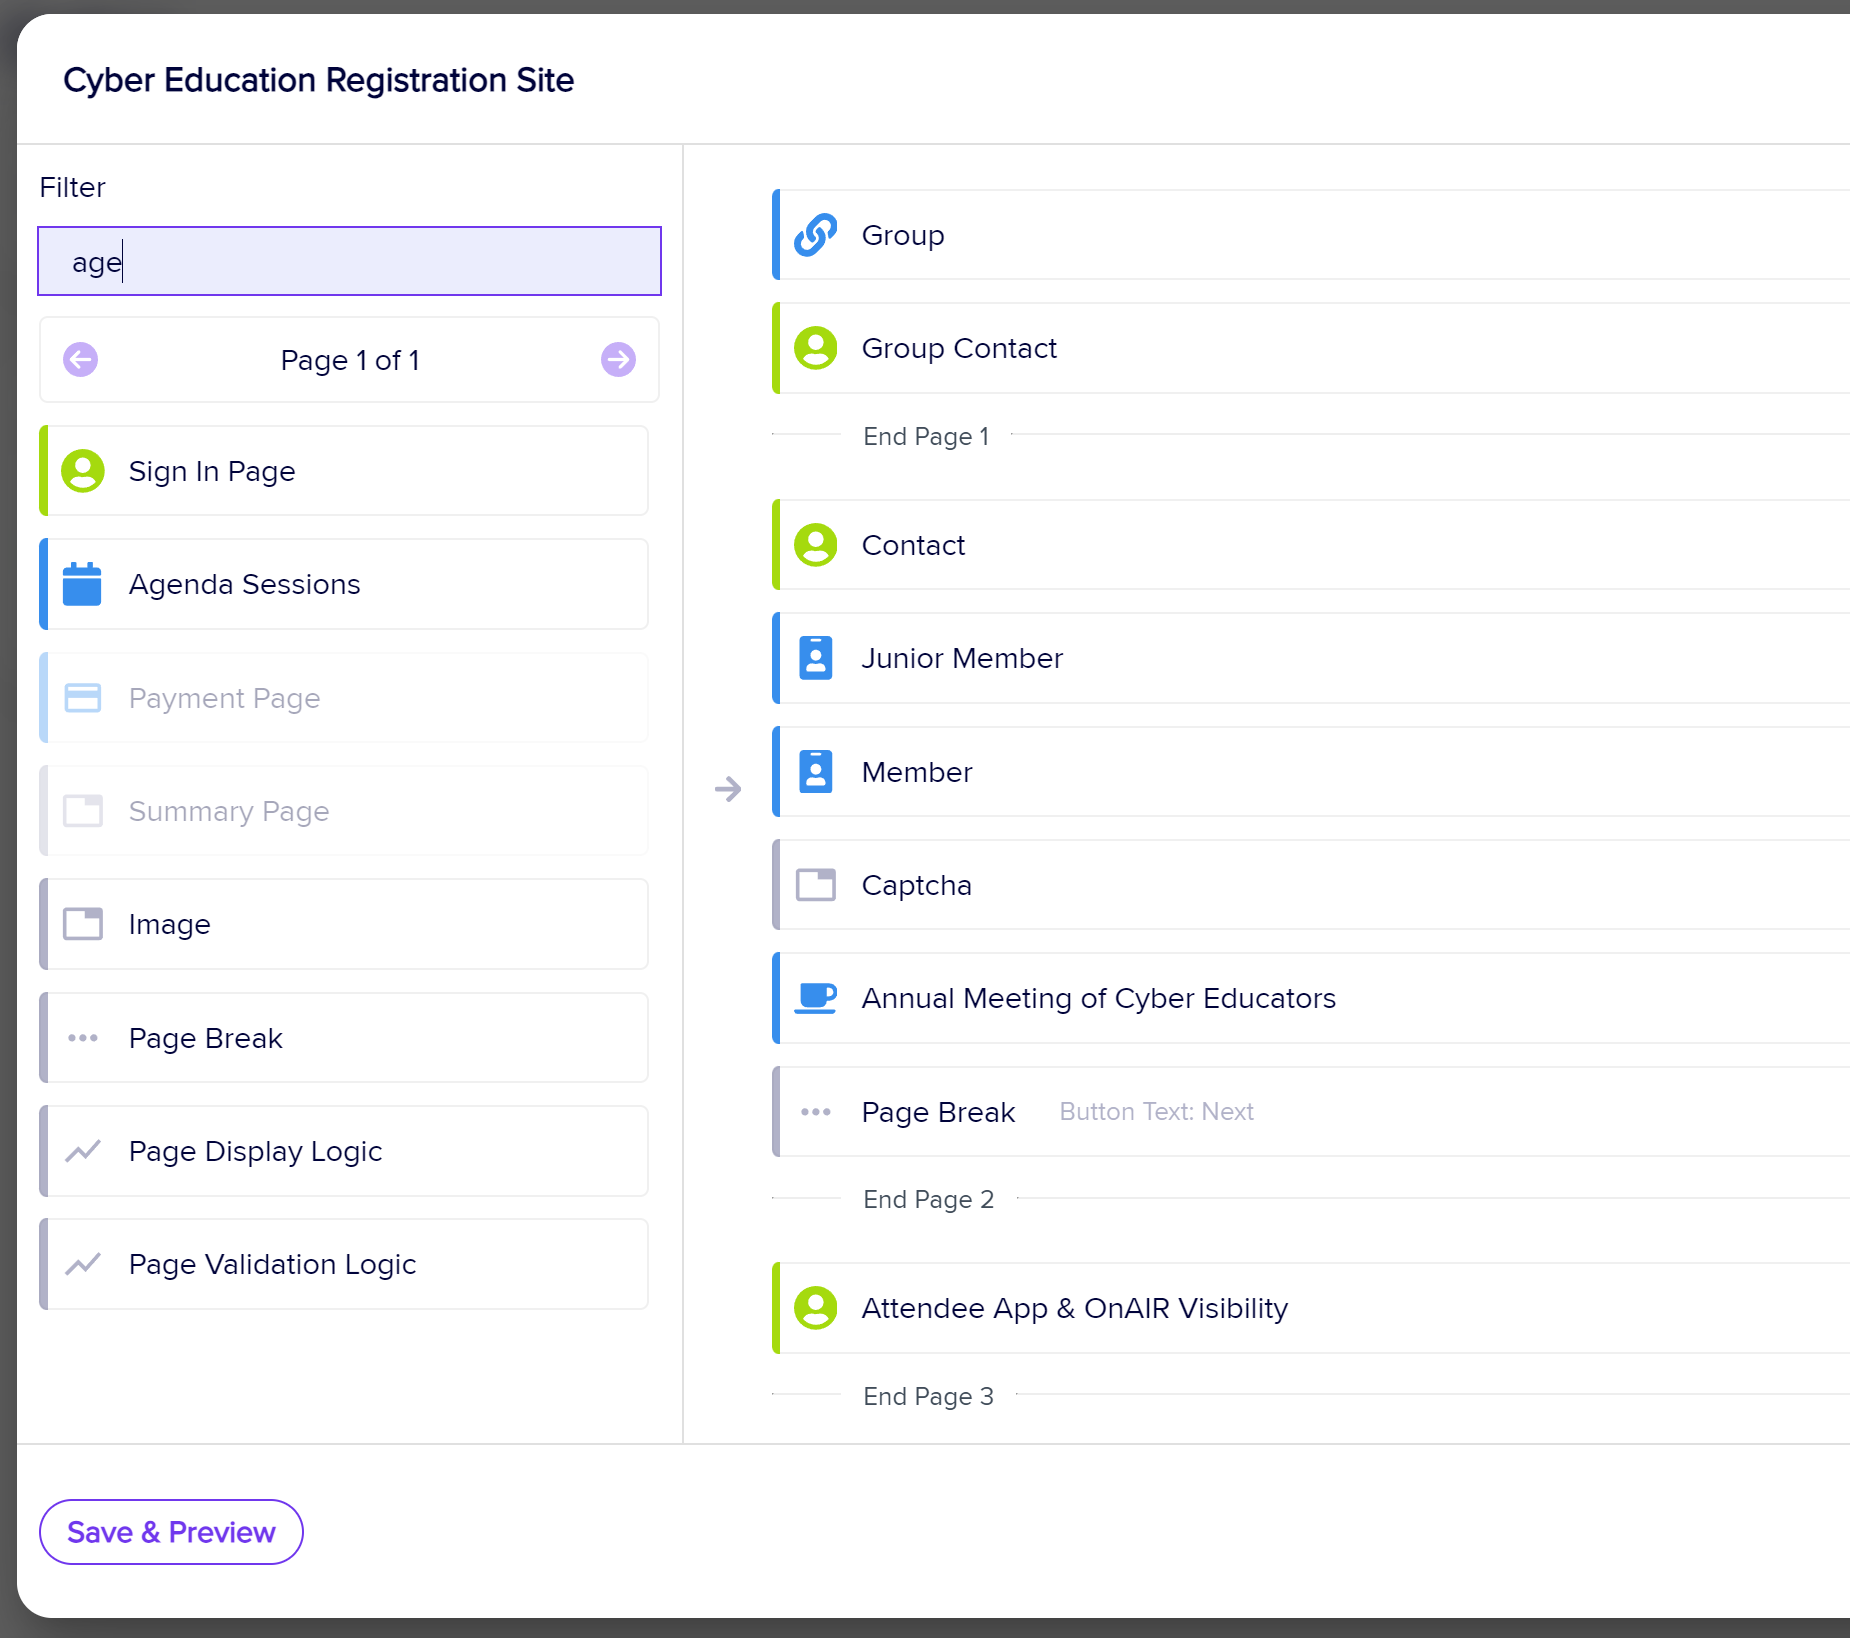

- Down Arrows - If a component or element displays a down arrow on the right-hand side, you can click the arrow to expand that component and add or edit information. For example, clicking on the down arrow in the Heading component will show fields for Heading Text, Details, Link etc.

- Setup Cogs - If a component shows a Setup Cog on the right-hand side, you can click it to expand the component to add details, drag sub-elements into the block, and text, links, headings, etc.

After an item's been dragged in, you can use the TRASH BIN icon to delete it. You can re-add it if needed, but will need to re-create any changes you made to settings.
Cloning or deleting a page
This feature is not available on every page. When building an interactive (registration) site, you'll see that some pages can be cloned or removed if there's a hamburger menu (stacked lines) to the bottom right (to the right of where it says, for example, "End Page 2") ![]() Left-click your mouse and select either Clone Page or Remove Page.
Left-click your mouse and select either Clone Page or Remove Page.
Other elements you can drop-and-drag
You may also have the option to drag in Headings, HTML elements (where you can add any type of HTML formatted content); images; and text elements. In an interactive site, you can also add various types of logic.
Details Tab - Details section
You'll see this in the builder view at the top right, and it's where you define settings for your website, portal, mobile app, or email document. Elements you can manage may include the below.
You can also read more details on these settings in articles about creating an interactive site, creating apps, and creating Merge Docs.
- Page titles
- Web page aliases
- Branding (style and design)
- Currency - the default currency for a specific site.
- Override Default Currency E-Commerce Account - if you want to use an alternate e-commerce gateway on this site.
- Inventory options - you can define the "no inventory" label text for this site.
- Button Text - enter alternate text for buttons.
- Live/close dates
- Analytics View - connect your Google Analytics view by selecting the correct view here.
Not all tabs are in all builders
What you see depends on what you're building - within each app, site, Merge Doc etc, you may see components or tabs you won't see elsewhere.
You may also see different sub-sections and sub-tabs under the Details tab.
For example, when building an Attendee App, you'll see an OnAIR tab and a Custom Branding tab; when building an interactive (registration) site, you'll see a Confirmation tab and a Submit Actions tab; on some apps there's a Users tab where you create access permissions.
Many apps and portals have a "Content" tab. These aren't drag-and-drop based, as the portal or app has a more defined structure.
For more information, search this site to read the article(s) on building that site, app, or document.
Details Tab - Optional Alerts
Use this feature to be informed immediately when someone registers on that particular interactive site (useful for VIP registrations, for example):
- Optional Alert Check Box - check the box to turn on alerts.
- Alert Level - select the desired alert level.
- Alert Message - enter the message to be sent with the alert.
Details tab - other tabs
Under the details tab, you can select other tabs such as Style, Confirmation etc. (these examples are from an interactive registration site).

Details Tab - Style tab
- For an interactive site, you can choose Classic, Curved or Panel; select colors; and change the brand.
- For a mobile app (Attendee App or Organizer App), you can choose a Theme, colors, fonts, icons and splash settings, and add custom CSS.
Details Tab - Confirmation Tab
On an interactive site, this tab makes it easy to send a confirmation message when someone registers. You can select many different options such as type of message, adding an attachment, and other details.
Details Tab - SEO (Search Engine Optimization) Tab
You can add Meta Keywords and a Meta Description to be embedded in your registration page, to help search engines (like Google) to index your page. Correctly setting these can improve your site's search rankings.
Details Tab - Messages Tab
You can change the default messages for when someone tries to visit the app or site before or after your specified dates.
Localization Tab (maybe under the Details tab in some builders)
The Localization Tab is where you can override the default language for your specific Interactive Site or portal. Options include:
- Override App Default Language - lets you define a new translation set for this site or portal.
- Base Language - choose the base language for this site or portal.
- Category - the default is all categories, or you can select a sub-category from this list.
- Search - lets you enter a search phrase so you can locate a specific translation.
- Translation List - displays the original text phrase on the left and the translation (Language Override) on the right.
Read this article for more information about Localization.
Submit Actions tab
Under the Submit Actions tab, you can automate actions such as sending an email, creating an alert, adding a marketing tag and more to happen when someone registers (or edits their registration) on this interactive site. This can happen independently of what you set up on the Details - Confirmation tab (so make sure these don't duplicate each other or conflict). You can read more about this in the article about creating interactive (registration) sites.