First, go to the Reporting Panel – look in the Functions Report library.

NOTE: This assumes that your certificate will be given out for attendance at something set up under the Functions module. The steps can be adapted to any module you need but the fields, however, will be different.
-
Select the Function List by Attendee report from the list of default Functions reports, and clone it using the Copy button (bottom of the screen).
-
Double-click the name of your copied report and type in a new name.
-
Select the Edit button to open the report editor.
-
Select all the data fields by clicking in the top left of the editor and dragging your mouse all the way to the bottom right corner, then pressing the delete key on your keyboard (or using the X).
![]()
NOTE: This is quicker than selecting individual fields, even though you may have to put some details back in later.
At this point, you may want to adjust the paper size or change your certificate from landscape to portrait layout.
To do this, select the Report Explorer icon on the right-hand panel
Select the pencil icon to the right to be able to edit properties such as page size. [You can also review the measurement units in this section.]

- Select the Report Explorer icon again.
- Use the arrow to the left of the word “Report” to expand the menu.
- Look for any items marked “Header” and select them, then delete them.
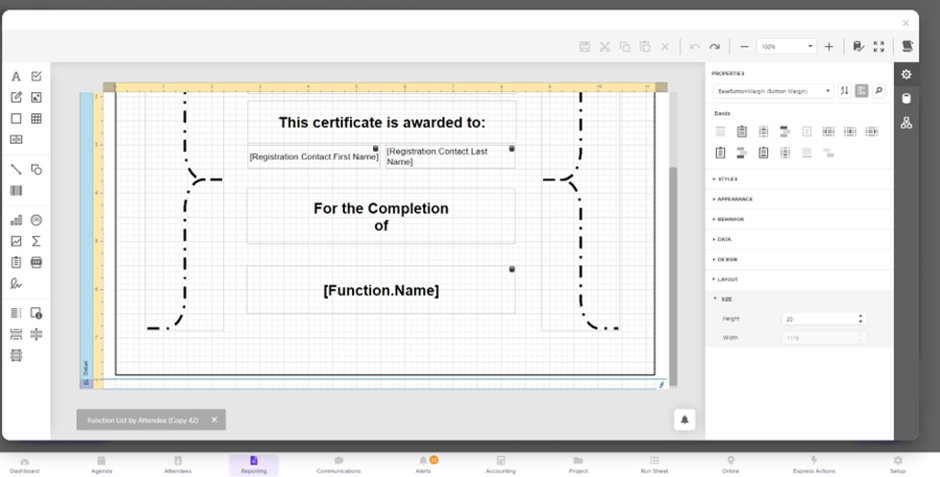
- S elect BaseTopMargin (Top Margin) and scroll down to Layout >Size , changing the height to 20 (for our example). Repeat for BaseBottomMargin (Bottom Margin).

![]() NOTE: The height of each page is the total of all ‘bands’ or elements that make up the page (margins, headers, footers, details, and sub-details). For example, if you have a detail with a height of 200, with a 100 margin on the top and bottom (2 x 100), that makes a total of 400. If the page height of the report was set to 300, then the certificates would be too big and print across two pages.
NOTE: The height of each page is the total of all ‘bands’ or elements that make up the page (margins, headers, footers, details, and sub-details). For example, if you have a detail with a height of 200, with a 100 margin on the top and bottom (2 x 100), that makes a total of 400. If the page height of the report was set to 300, then the certificates would be too big and print across two pages.
- From the same list as the previous step, select Detail [a band] and the pencil icon to edit, then in Layout >Size, set the height of the band to 786.
- From the fields list (select the Data Source/cylinder icon and search), drag in the fields and labels that you would like on your certificate (such as attendee name and Function name), and add labels that suit your certificate.

- Change any colors, font sizes etc to suit.
- If you wish to, go back to Report and use the pencil icon to find Report >Properties >Appearance >Watermark where you can add an image, gradient or texture as a watermark.
- Save and exit the report editor.
- Test your certificate using a small number of records to ensure your report is running correctly.

