There are times in the life of an Event Planner that you just need to send out a communication. You might need to send an update to everyone attending a conference, or a quick payment reminder to someone who forgot to pay.
Whatever your reason, the Send Communication Action option is the place to go.
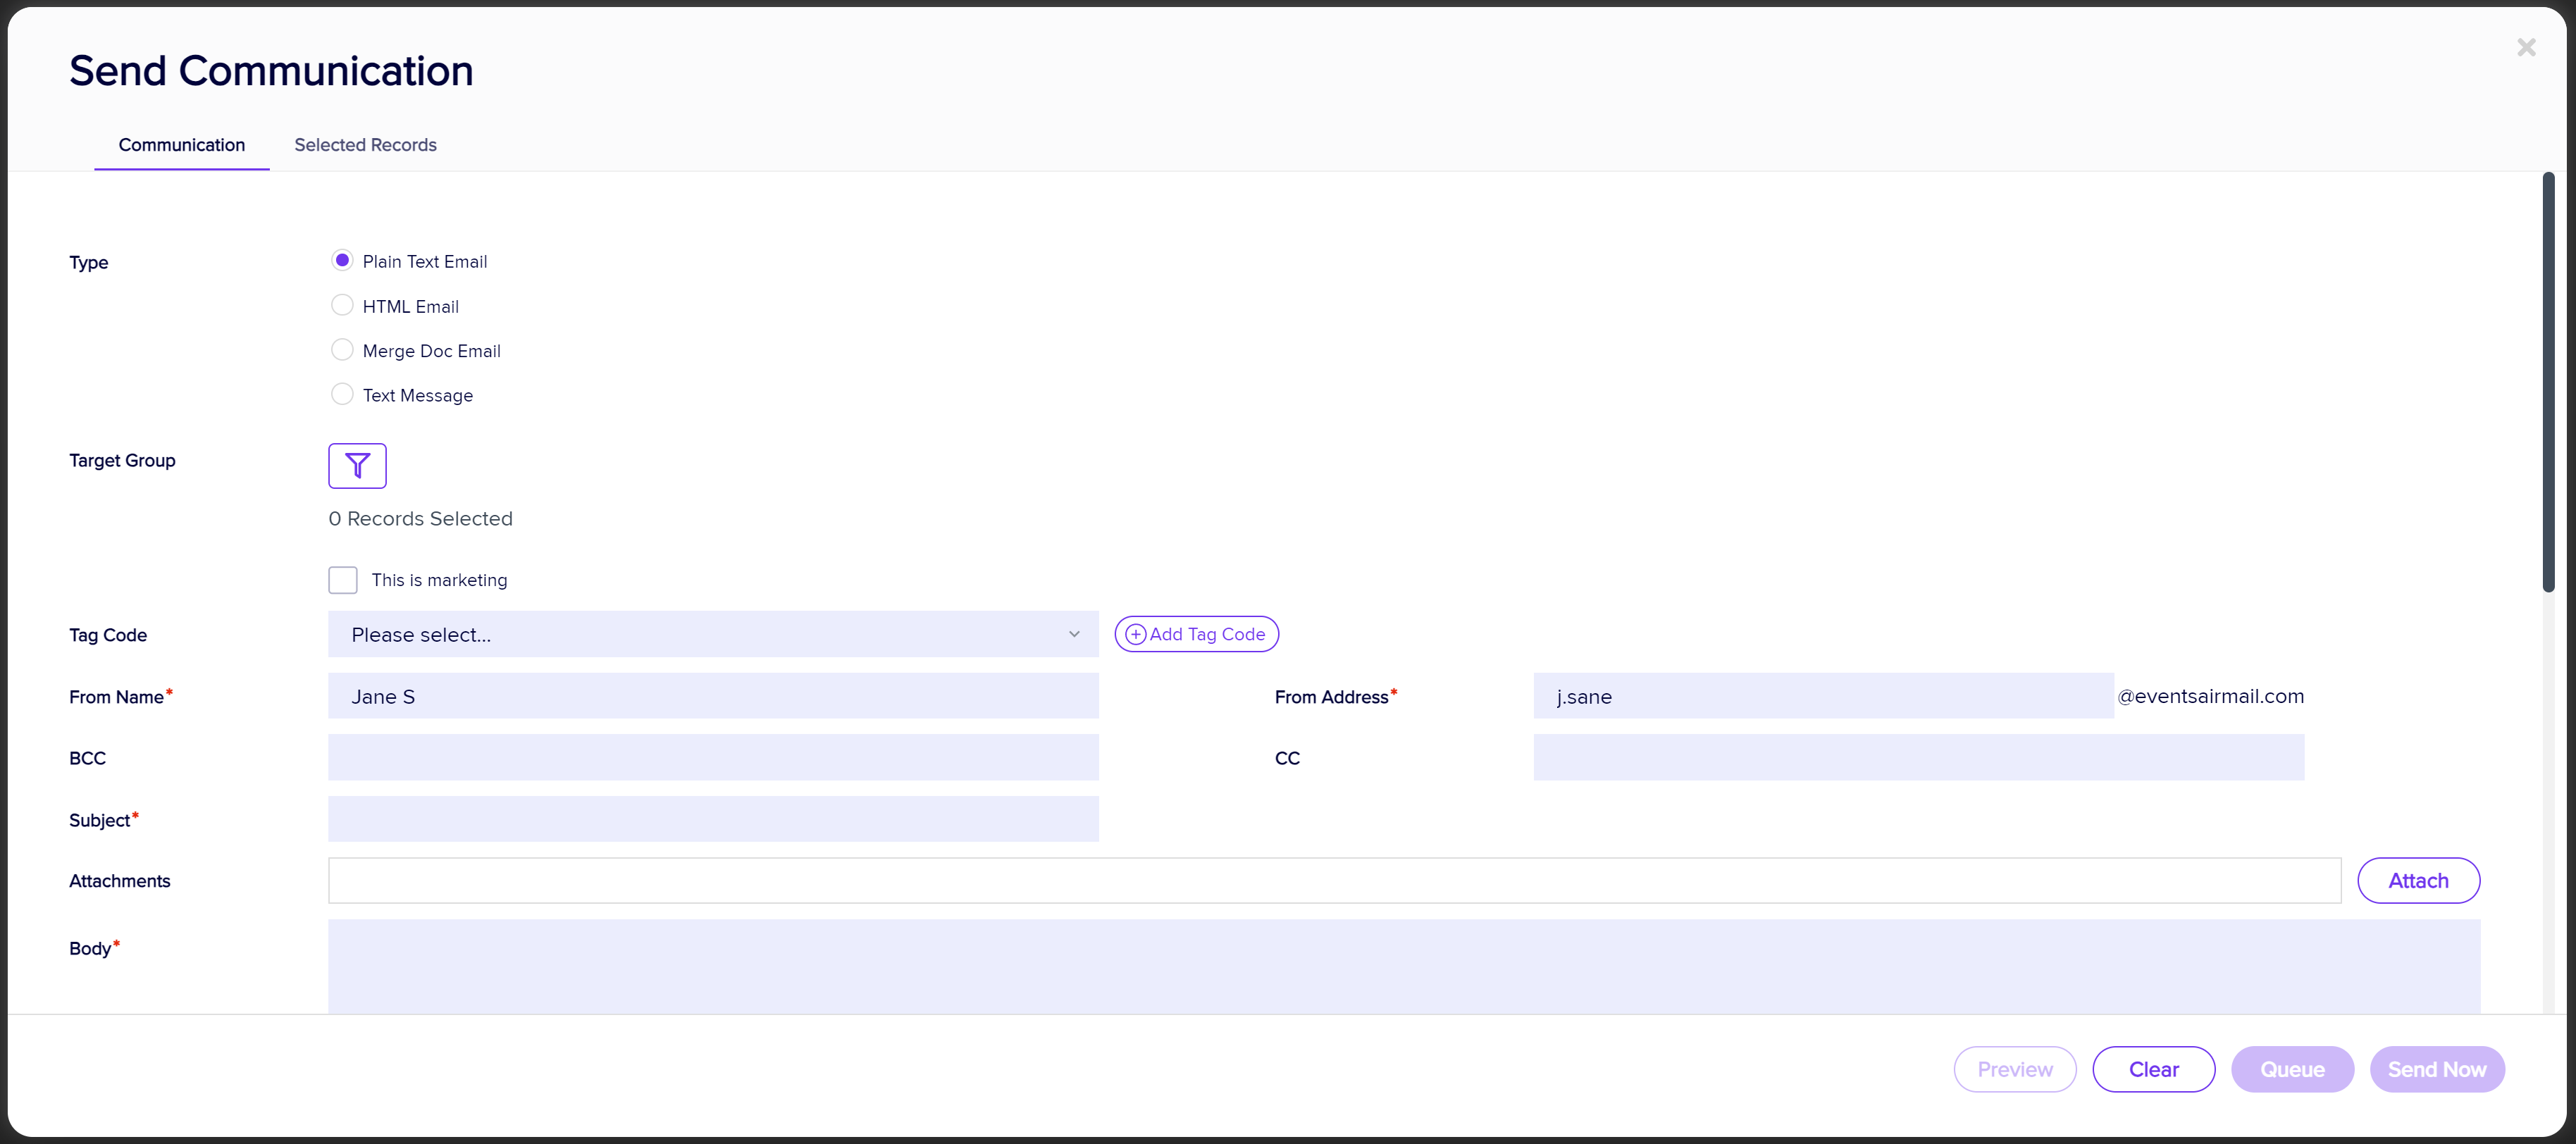
Clicking on the Send Communication Action Button brings up this Send Communication Panel:

Your options include:
- Type - select the type of communication you plan on sending. Please note that some of your communications will change depending on the communication type you select:
- Plain Text Email
- HTML Email
- Merge Document Email
- Text Message
- Attendee App Message
- Target Group - selecting this lets you filter to any subset in the EventsAir database.
- This is Marketing Checkbox - this option will indicate to EventsAir that this is a marketing communication, and as such, provides an opt-out option within the email body. It is important to note that if someone has registered for an event, these communications are typically NOT considered marketing, since they are in a formal business relationship to you. The marketing opt-out is required to conform to anti-spam standards for email communications.
- Tag Code - Whenever you send an email to a group of attendees, it can be extremely useful to categorize a specific email group or campaign. With Communication Tags, you can enter any phrase to categorize a specific email campaign you've sent. Then, you are able to search and filter on any specific campaign at a later time.
- From Name - you can enter the full name of the sending party here.
- From Address - you can enter the sender's email address here.
- BCC and CC - you can enter Carbon Copy (Cc:) and Blind Carbon Copy (Bcc:) email addresses here.
- Subject - this is where you enter the subject of your email.
- Attachments - this option lets you attach files to your communications, such as FAQ sheets or maps.
- Body - this will change based on which option you select. HTML messages will get a full HTML editor, otherwise you will see a text window to enter your message.
- Merge Fields - this useful feature lets you merge data from a selection of database merge fields into your communication.
- Site Links - this lets you insert a link to one of your Interactive Sites.
- Add Auto Login Token - this will insert a short line of code to your site link that when clicked, will open the Interactive Site with the contact's or attendee's details already populated in the site.
- Delay Delivery - lets you set a future date and time for all of your messages to be delivered.
Selected Records Tab
The information on this tab shows you all of the people who will receive your communication. By default, without any filters applied, you will see all the records in your database. If you apply a filter, only those matching records will display.
Save as Data Snapshot Option
Selecting the Save as Data Snapshot option lets you save the current set of Selected Records. You can then later re-use that Snapshot in a future filter operation. For example, if you made a set of changes to a specific selection of records, you can recall that same set of records in order to send an email communication, or run a report specific to the selection.
Preview
From both the Details Tab and the Selected Records Tab, you can preview any communication by selecting this option.