This guide will walk you through how to create and print a simple name badge. You can find additional resources on this help site by search ‘name badge’.
Creating your name badge
Navigate to the Setup panel.
On the right side, select the Name Badge Editor.

Then click on the + symbol to create a new badge layout.

The new-look EventsAir Version 16 has arrived! If your version of EventsAir hasn't yet been updated, you may see something more like the below.
![]()
Click on the Plus symbol to create a new badge layout.

------
Enter a name for your new badge layout.
Choose the name badge type, based on what content you want to include on the badge. You have several options, including:
- CE Course Attendee – can pull information from the Registered Attendee Details when registering students for CE Courses.
- Contact – can pull information from the Contact Record.
- Contact (including all module data) – can pull information from the Contact Record and from any other module in EventsAir.
- Contact (including key module data) – can pull information from the Contact Record and from useful areas such as registration and function modules in EventsAir.
- Exhibition Name Badges – can pull information from the list of entered Exhibitor Name Badges when names are entered during Exhibitor Registration.
- Function Attendee – pulls information from the entered badge names in the Functions Module for the registered attendees.
- Function Guest – can pull information from the entered badge names in the Functions Module when you are collecting all attendee names for your functions.
- Registered Attendee – can pull information from the Preferred Badge names and other data fields associated with the Registration Module.
- Registered Partner – can pull information the Accompanying Person Preferred Badge names and other data fields associated with the Registration Module.
Note: For most registration-focused name badges, you can use one of the Contact badge types.
- Select which registration types to associate with this badge (this is helpful if you want to have different badges for different registration types).
- Select Create. This will bring you to the Specify Page Settings page.
Specify page settings
Specify Page Settings is an optional section that lets you select from hundreds of different name badge templates. This is useful if you're printing your name badges in advance, on sheets of six to ten name badges per page. These templates can be purchased in standard layouts, or you can use the page size and parameter settings on the right side to create a layout to a custom badge template.

In this example, we're creating a custom individual name badge layout, so we simply choose Finish to bypass these options and continue to the name badge editor.
The name badge editor (similar to the Report Editor)
Normally, when you first access the name badge editor, you will see a default layout similar to this.

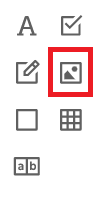
On the left menu, you will see a variety of formatting tools (icons) that let you add in a variety of content, including:
- Labels
- Images
- Tables
- Lines and shapes
- Other items not typically used for creating name badges
On top bar, you will see icons for important options such as:
- Save changes
- Undo and redo
- Cut, copy, paste, delete
- Zoom
- Full Screen
- Other options
The right hand panel is where you create settings and manage content and label elements.
|
Properties – lets you manage a variety of design and content elements, including:
Many of these options are not used when designing your one-up name badge and you should only use these if you are comfortable adjusting them, in either a report or a name badge layout
|
|
Expressions – an advanced set of tools for managing different programming expressions |
|
Field List – used to place content from the EventsAir database onto your name badge |
|
Report Explorer – used by advanced users to navigate around a report or name badge layout |
Building a name badge template
These are only the basic elements of a name badge. Your designs will be unique to your organization and if you have any questions, please reach out to our support team for any questions you may have.
Step 1: Be sure to edit the whole badge
- Make sure the Properties Menu is displayed on the right. If you don't see it, you'll need to select the cog icon to open it.
- Make sure you are editing the entire layout and not a specific band or area of the template. To do so, make sure XtraReport (Report) is displayed in the property’s selection field at the top of the Properties Menu.

Step 2: Set your units of measurement
The Name Badge editor can work in:
- Tenths of a millimeter
- Hundredths of an Inch
- Pixels
To do this:
- Expand Report Tasks
- Set Your Measure Units as required
For this example, we will work in tenths of a millimeter

Step 3: Change page settings
- Expand Page Settings section
- Expand Margins section
- Set all margins to 0 (required for most one-up badge formats including roll type printers)

- Back up at the top, change XtraReport to Panel 1 (you can also click in the blue badge area in the layout).
- Expand the Layout section
- Expand the Size section
- Change height and width to the correct dimensions for your name badge.
- For this example (a vertical badge): Change height to 1000; change width to 600

Step 4. Adding an image header
To add a graphic image to the top of your badge:
- Drag an Image element from the left menu...
 ...onto your badge. (You can also hover over an icon if you're not sure what it is).
On the right, in Picture Box Tasks (which will display when you select your new picture box): - Select what image will appear in your box using Image Source (click the three dots to open up files, or put a source URL into the Image URL box).
- Set Sizing to Zoom Image
- Resize picture box to the width of the badge
- Resize the height as needed
HINTS: You can check the width of your picture box by selecting it, then checking the width in the Size section. Under "APPEARANCE", you can remove the border on a picture box by changing the Border Width option to Zero. You can also remove the border by clicking the "no border" option (the first of the border options shown).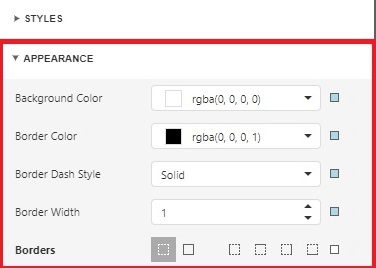

Step 5. Add data fields to your badge
The next step is where you decide what information you want to display on the badge. This is easily handled by dragging and dropping the needed fields onto the badge layout and formatting the content.
Please note we are building a sample badge; you can choose to use or not use any element described.
- On the right, select the Fields icon (the silo/cylinder) to see Field Lists.
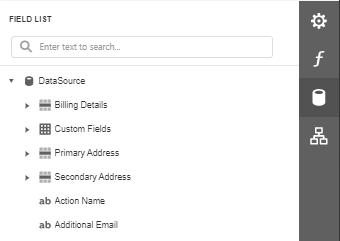
- Expand Data Source
- Expand Contact
- Drag First Name and Last Name merge fields over to your badge design area
- Drag over Organization
- Drag over Country

![]()
Step 6. Format your merge fields
- Click on the Properties View on the right.
- Expand the Appearance section.
- As needed:
- Remove borders
- Set fonts and font sizes
- Set all fonts to Bold
- Change font colors (if needed)
- Drag your cursor to selection all of the merge fields
- Drag and set the width as needed
- Set the text alignment as needed (typically centered)
- Adjust spacing between fields as needed
- Select Save to save your settings
Your example badge will start to look a little like this:

Advanced options
Once you build your basic name badge you can easily add to your template with a variety of advanced options.
Images and photos
- Drop in photo or images simply by dragging over the Picture Box.
- Make an image into a background by selecting Send to Back from the Arranging options on the right.
- If you have collected headshots of attendees in advance, you can easily insert the “Photo Uploaded At” option found in the Field List.
- Remember, the onsite portal, used for onsite check in and badge printing also has a printing function, allowing you to take photos of attendees and insert them onto the badge and then print it.
Adding a QR Code or Bar Code to a name badge
- Click on the Field List view on the right.
- Expand the Contact List.
- Drag across either the Contact QR Code or the Contact Bar Code fields. For this example we will use the QR code.
- Position your QR code below the country line and size to fill the space appropriately.
- Back in Properties on the right, remove the border.
- Also in Properties on the right, set the sizing to Squeeze.

Calculated fields and expressions
There are times where you want two or more merge fields shown on the same line, usually either [City, State] or [First Name Last Name].
The challenge is how to set these up so they flow appropriately together without extra spaces. Fortunately, this is easy to do in EventsAir – using a feature called calculated fields and expressions.
In this example, we are going to create a First Name Last Name Expression so these will appear on the same line.
- Open the Field List, using the Fields icon on the right (the silo/cylinder).
- Click the DataSource field to see options, then click the Add Calculated Field icon (the second icon).

- A new field called calculatedField1 will appear in the list.
- Drag this field to the desired location on badge template.
- Click on the field to select it.
- Be sure to change the font and font size as needed.
- To edit the calculated field, go back to the Field List and expand DataSource. Scroll down until you find calculatedField1.

- Select the edit icon, and then find the Expression field at the bottom.
- Click on the three dots on the right to edit it (this will make the Expression Editor window appear).

The Expression Editor window looks like this:

- To create your expression and combine fields, select Fields in the left window.
- For our example, in the second window, locate the Contact section, then click the arrow to expand it.
- Look for First Name and Last Name fields (again, you'll need to locate the fields that suit your task).
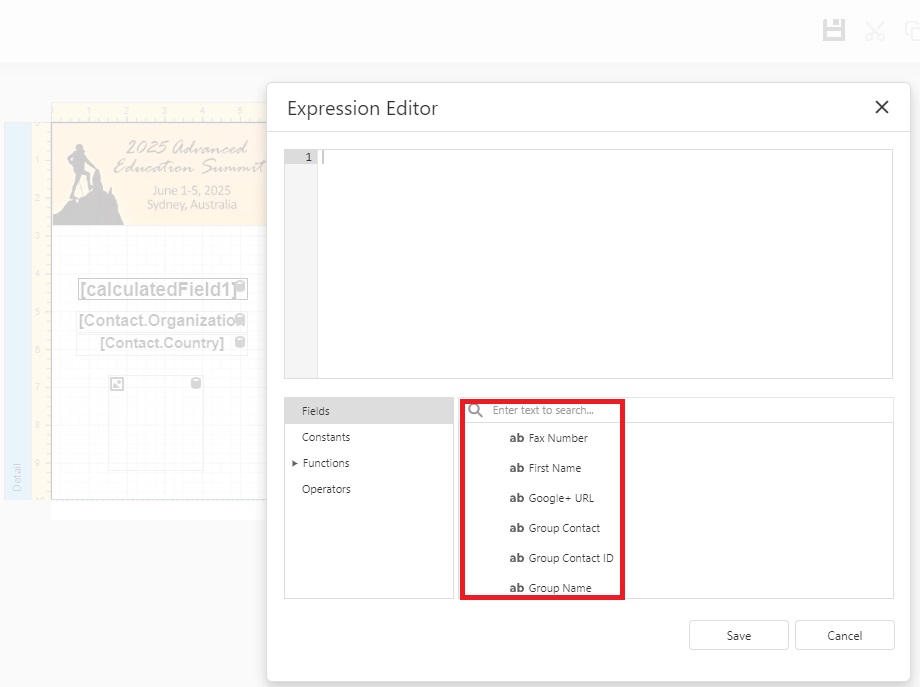
- Double click one at a time on First Name and then Last Name. The two fields will appear together at the top of the editing window.


- Next, you will need to insert a space between the two fields. To do so, enter the following code between each field:
+ ‘ ‘ +
The code is: a plus symbol, followed by a space, a single quote mark, followed by a space, another single quote mark followed by a space, then finally a second plus symbol.
- Remove any other spaces on either side of this code, so that your expression now looks like this:

Save and close. Your badge will combine the first two fields on the same line, like this:

This technique is useful in many different ways. If you want to insert a comma, enter it between the two single quotes. (You might do this if creating a calculated field that combines City with Country, for example.)
Remember, this technique is required if you want to join two or more expressions on the same line, automatically adjusted so there is just one space between the first and second fields.
Registration type bands
Another popular addition to name badges is to display a color band with the attendee’s registration category displayed.
This way, the registration type, such as Attendee, Exhibitor or Presenter are displayed and be easily viewed by other attendees.
- From the left menu, drag across a Label (the capital A icon).
- Pull to the width of the name badge or resize as needed.
- Position the label as needed.
- Set the font, font weight and alignment as needed.
- Click on the Expressions icon (the italicized F) just to the right of the label.
- Click on Fields, then navigate to the registration section.
- Expand Registrations and then expand Registration Type.
- Double click on Name, Apply, and Save.
- Finally, under Appearance, you can set the background color of the label as well as the font color.


Using expressions for registration type colors
You can use the Expression Editor to automatically display specific color bands based on what registration type is shown for a specific attendee.
This allows you to have specific color bands for each different registration type, (e.g. blue for regular attendees, orange for exhibitors and red for presenters) that are automatically displayed based on the registration category.
- Create and add a registration type band with color for each registration type as shown in the previous section.
- Then, click on the expression icon to open the expression editor for that field.
- Navigate to the visibility tab and enter the following code entering the name of the registration this band is for.
Iif([Registrations.Registration Type.Name]=='(registration name)',TRUE ,FALSE )
Please note, expressions can be case sensitive. You will need to enter the name of the registration exactly how it is entered in EventsAir.
- Repeat this for each registration band.
- Finally, select your registration bands and in the properties to the right, expand the behavior section and untick visible. This will make so that only the specific registration band will turn on and be visible.
Testing your name badge
It is quite easy to test your name badge as you go through and customize the design and format.
Locate a test attendee record and from Attendee Tools, select Name Badge to preview what the badge will look like.
![]()
Printing badges onsite
When planning for onsite check-in at your event, you will typically prepare a name-badge template that will let you print name badges one at a time “on-demand.”
In other words, when attendees check in via self-check-in, auto event check-in or assisted check-in using the Onsite Portal, their name badge prints at that time ready to be placed in a name badge holder and given to the attendee.
There are a variety of printers you can use for printing one badge at a time, and these can be thermal (black print only) or full color using ink jet or other technology.


You can purchase these printers or rent them as needed, and many companies provide both a printer and a touch screen kiosk using either a PC computer or a Microsoft Surface Tablet (also using Windows), making it easy to integrate with EventsAir.
For more information on printing badges and going onsite, search our help resources for these topics.